Archive for the ‘Family’ Category

Happy Thanksgiving! 2020

Tuesday, November 24th, 2020

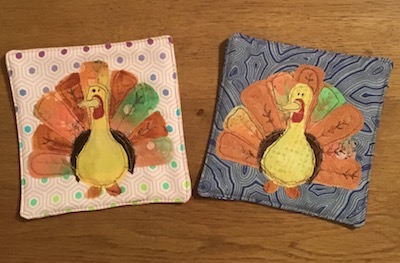
I gifted these little gobblers to my grands for Thanksgiving -

Turkey coasters I made a few weeks ago.

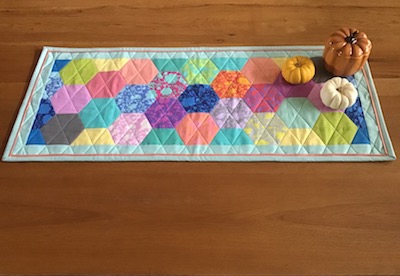
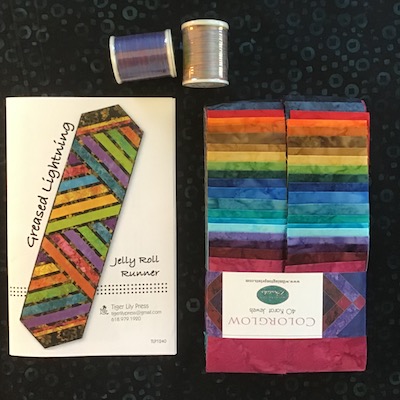
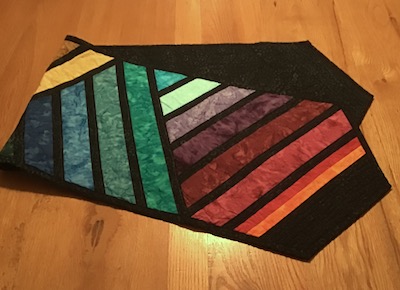
Oops! I added a quick project to my list this past week. Today is my DIL’s birthday! I purchased this kit to make a Batik table runner for her maybe 2 years ago. And it got lost in the quilt cupboard. I did some digging to unearth it.

The jelly row and pattern made up the kit. I bought the black batik for the accent fabric, back, and binding.

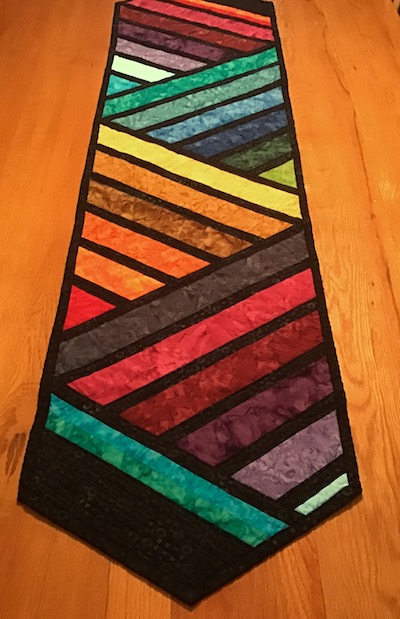
I ended up using a gray thread to quilt just in the black batik.

Gifted today! She loves Batiks!

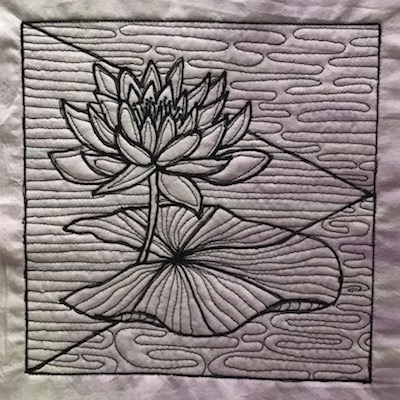
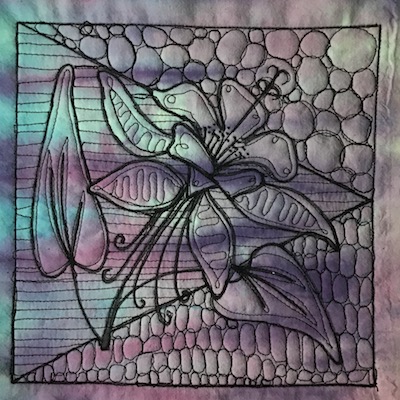
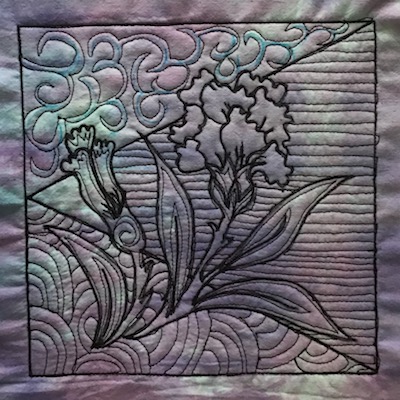
I have one more block to stitch up for Helen Godden’s Flower Power 2 quilt along. Here are blocks 6 – 8.

Carnation. Oh my! I see a portion I missed! Got to go back and finish that!

Lotus Flower

Columbine. Block 9, not photoed, is a Passion Fruit Flower. I’ll get to it this week, after Thanksgiving!

I did sew the first three sections of my son & DIL’s quilt together. I still need to add sashing over the seams as I’m following Pauline Rogers quilt-as-you-go method. Find her directions in her Quilt As You Go Handbook.

Happy Thanksgiving to my USA readers!

Last Week’s To-Do List:

  1. Finish quilting center of son’s quilt.  ✔️ Sorry, still no photo.
  2. Sew the first three sections together for son’s quilt.  ✔️
  3. Stay up to date on Flower Power 2 quilt along. ✔️ Blocks 1 – 8 are completed!  The last block was presented today. So hopefully later this week, I’ll finish it.

This Week’s To-Do List:

  1. Celebrate Thanksgiving! Since my family has decided to not have a family gathering this Thursday, (Covid), my local kids suggested a food swap for Thanksgiving. That way we are not all cooking the full traditional meal. I’m doing the turkey, dressing, gravy, and 2 pies. The kids are filling in everything else. I’ll let you know next week how the swap works out.
  2. Stitch up last block of Helen Godden’s Flower Power 2 quilt along.
  3. Add sashing to son & DIL’s quilt.

Linking to To-Do Tuesday hosted by Home Sewn by Us.
One Monthly Goal – November 2020

Monday, November 2nd, 2020

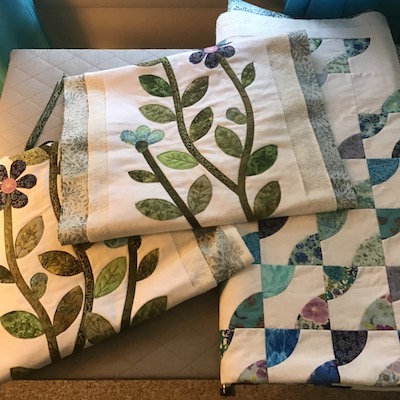
I’m getting there! I’m continuing on with the quilt for my son and DIL. Last month I completed the machine appliqué for the two side panels of the quilt. And then I sandwiched the center and two side panels, ready for quilting.

My goal for November will be to quilt these three sections.

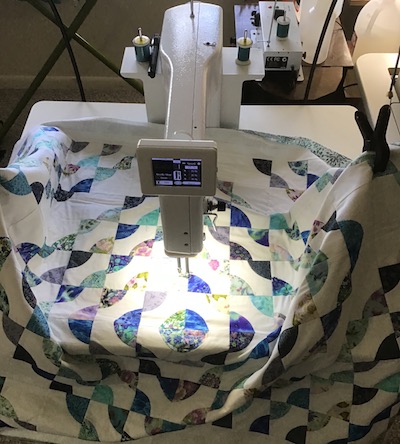
The center drunkard’s path section all ready for quilting!

Once that is completed, I’ll move on to quilting the two side appliqué sections. And hopefully I’ll even get started on attaching appliqué vines, leaves, and flowers to the top and bottom sections that go above and below the center of the quilt.

Linking to One Monthly Goal hosted by Patty of Elmstreet Quilts.

One Monthly Goal – October 2020 Finish!

Thursday, October 29th, 2020

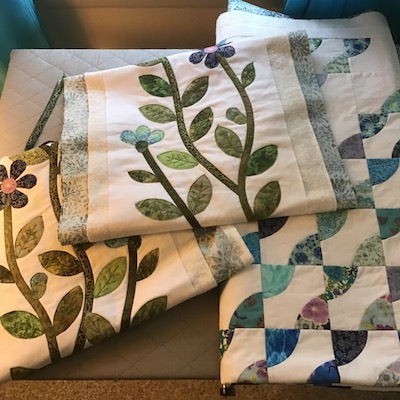
My goal for October was to machine appliqué flowers into place on the side panels of the quilt pictured below.

pattern by Sue Pelland

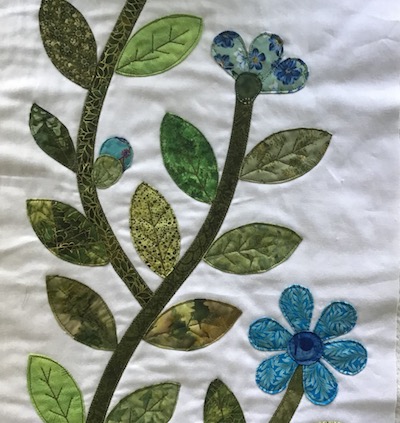
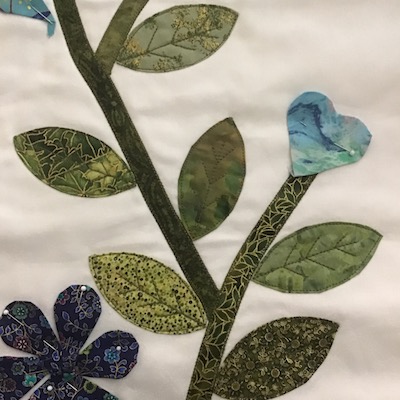
I met my goal, flowers, leaves & vines are now machine appliquéd into place on the two side panels.

Note, I did turned appliqué for all the pieces, not fusible web per instructions.

Next I moved on to sandwiching the finished panels and center of the quilt.

I traveled east to visit my Father who lives in assisted living in PA. The facility was allowing 30 minute visits with all the Covid precautions. That meant limited sewing this month.

Linking to One Monthly Goal hosted by Patty of Elm Street Quilts.

Journeys

Tuesday, October 27th, 2020

October 15-25 my hubs and I traveled east to visit family. My father lives in a retirement community in PA. Due to all the Covid19 restrictions we held off our trip east until we could see Dad. We scheduled two 30 minute visits, 6′ social distancing wearing masks, the distance ended up to be 11′ apart! Dad could not hear us! An aid sat by Dad’s shoulder and repeated everything we said. It was crazy, but I’m thankful I got to see him. While out east, we caught up with our brothers & sisters and their families who live in the area. Besides Dad not being able to hear us, it was a great trip.

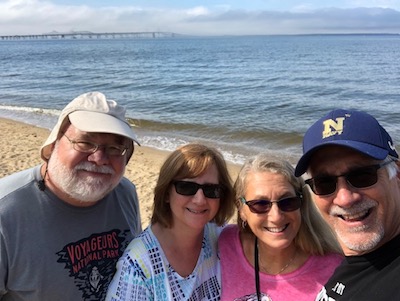
Terrapin Park, Kent Island, Chesapeake Bay. Hub John, me, sister Lauren, BIL Russ. Bay Bridge in back ground.

My Journey 2 Nebula continues.

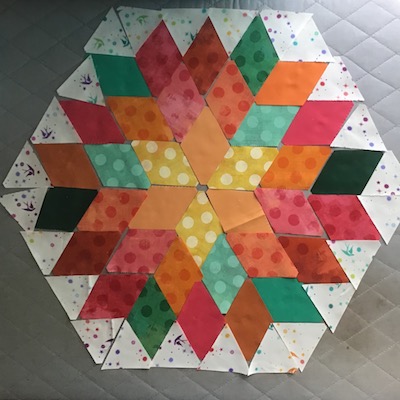
Project 4 on the journey, Rock Candy layout

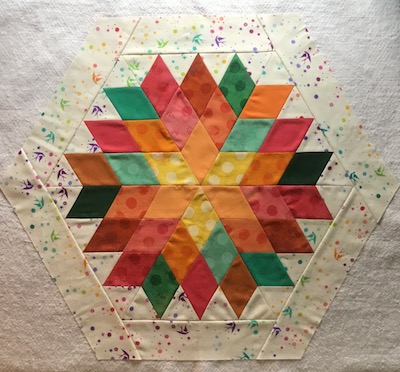
Rock Candy pieced & sandwiched

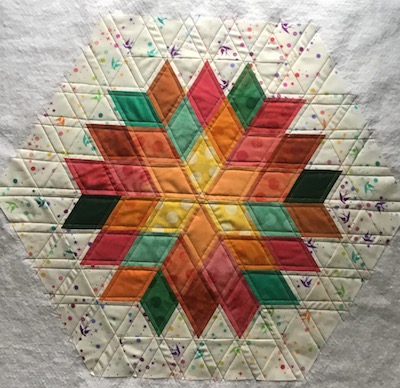
Rock Candy quilted. I’ll use a rust fabric for the binding.

Last To-Do List:

  1. Cut pieces for project 4, Rock Candy in #Journey2Nebula. ✔️ Cut, sewn, pieced and quilted. Ready to bind.
  2. Sandwich baby quilt. ✔️ But it will be set aside for a while as plan has changed.
  3. Short week for sewing, hubs and I are doing some traveling the next two weeks.  Hand embroidery just might happen.

This Week’s To-Do List:

  1. Bind Rock Candy, project 4 of #Journey2Nebula
  2. Cut pieces for project 5, Candy Dish in #Journey2Nebula
  3. Start quilting center of quilt or appliqué background (the quilt for my son & DIL)

Linking to To-Do Tuesday hosted by Home Sewn by Us.
Pretty Piecing

Tuesday, October 13th, 2020

Jawbreaker is quilted and bound. I used a stencil to mark the quilt design. Then stitched using a free motion foot to stitch over the marked lines, next echoed the design.

I stitched a simple ribbon design in the outer border. For binding I used the flange technique to add a pop of purple between the blue binding and border. This quilted table topper measures 21  1/2″ square. Quilted with Superior Threads King Tut DeNile Variegated thread Color # 927. This was project three in Julie Herman’s Journey 2 Nebula quilt along.

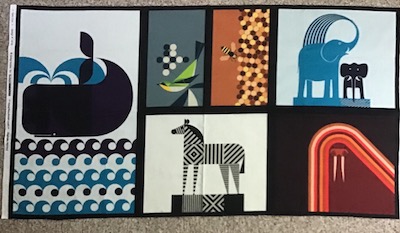
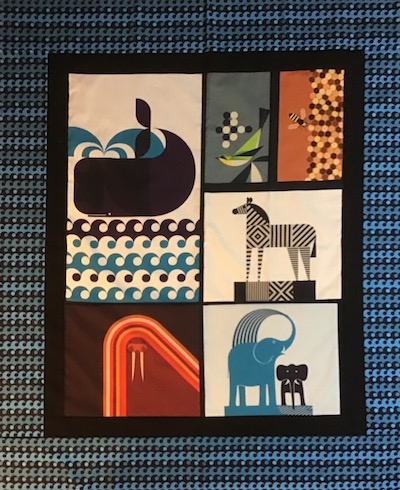
I started a new project. Which is a repeat baby quilt I made earlier this year. I bought 2 Geo Zoo panels when a LQS sadly went out of business. I didn’t have plans for them at the time, but 2 family members have since announced babies on the way. One panel baby quilt has already gone to the new little fellow. And this second one will be going to baby due in February 2021.

To make the top, I cut the elephants and walrus off the right side of the panel and stitched them on to the bottom below the whale and zebra, making the panel long and narrow rather than short and wide.

Then I added a 2″ black border and 6″ wave print as an outer border. The back is also pieced and ready to sandwich.

For the appliqué quilt, I have decided to do the 9 sections of the quilt in the quilt-as-you-go method. I have the center section pieced, and the two sides appliquéd.

This past week I sandwiched those three sections so they are ready to quilt. They will be joined together once quilted.

Last Week’s To-Do List:

  1. Sew Jawbreaker into a pillow case, project 3 in #Journey2Nebula.  ✔️ Completed, but decided to go with a table topper instead of a pillow.
  2. Baby quilt! ✔️ Top & Back pieced!
  3. If there’s time, figure out next step in appliqué. ✔️Sandwich the three completed pieced & appliqué sections.

This Week’s To-Do List:

  1. Cut pieces for project 4, Rock Candy in #Journey2Nebula.
  2. Sandwich baby quilt.
  3. Short week for sewing, hubs and I are doing some traveling the next two weeks.  Hand embroidery just might happen.

Linking to To-Do Tuesday hosted by Home Sewn by Us.
 

Mostly Appliqué

Tuesday, October 6th, 2020

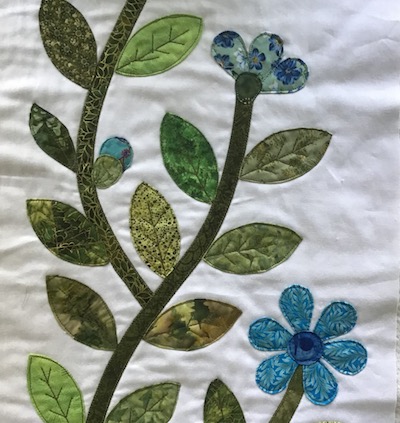
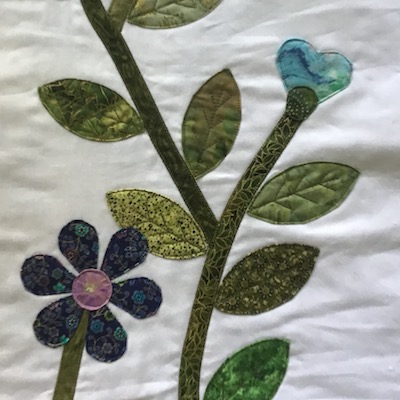
Wow! Stitching the appliqué flowers in place didn’t take as long as I thought it would.

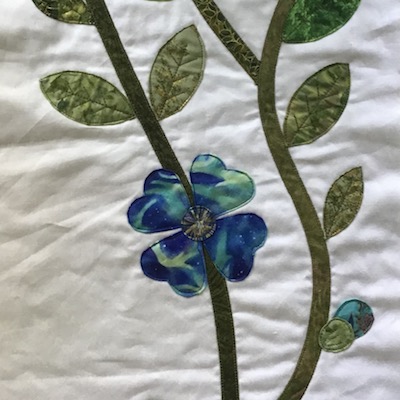
3 petal flower, bud, and six petal flower

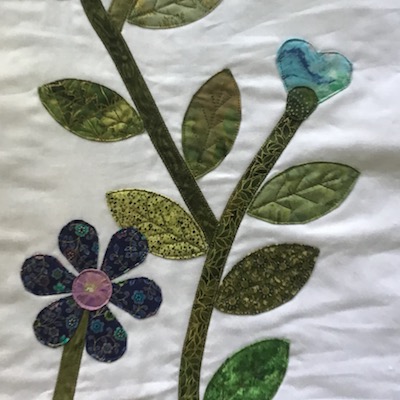
4 heart shaped petal flower, bud

Heart shaped bud, 6 petal flower. There are 20 flowers appliquéd in place in a mix of shapes and sizes show in photos above.

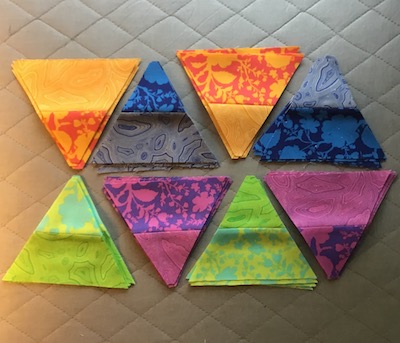
Next up was sewing strips and cutting triangles for the Jawbreaker pillow.

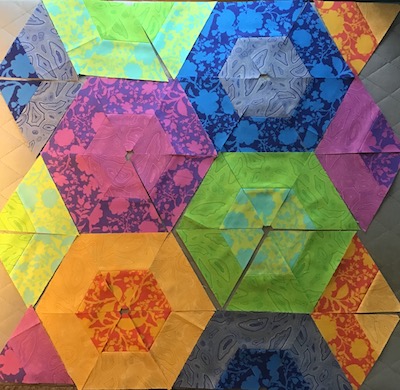
Jawbreaker is a Jaybird Quilts pattern, fabric is Tula Pink’s True Colors.

Playing with lay out. This week it will be sewn into a 20″ pillow top.

Granddaughter time!

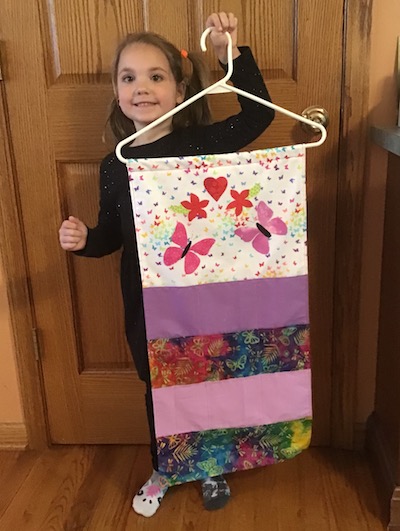
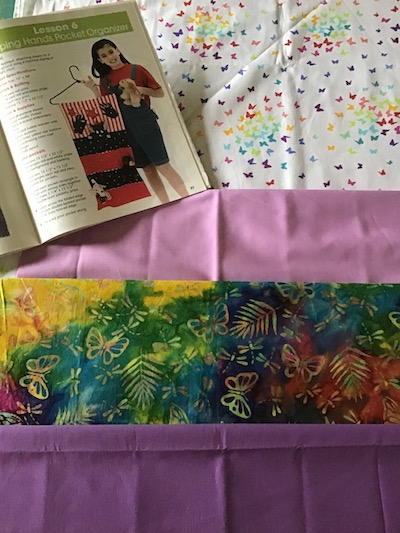
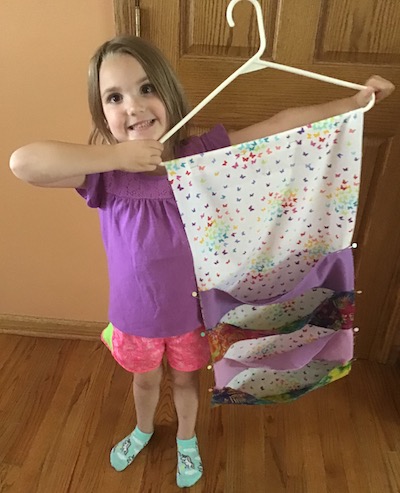
I had broken up the Pocket Organizer sewing into 3 lessons. But she just didn’t want to stop sewing when she came over this week.

We got the 12 pockets stitched, and the back sewn on which in my mind was lesson 2. Then she moved on to the appliqué pieces which was lesson 3. She traced the butterflies and heart from templates on to fabric with Misty Fuse attached to the back. After cutting the shapes out, they were pressed in place. Directions say to outline appliqué pieces with glitter glue. It went to her house for that step. Finished pocket organizer sewn on to a hanger and ready for use!

Another new project has creeped in. A nephew and his wife have announced they are expecting their first baby. Time to make a baby quilt. I’ll use Geo Zoo panel by Robert Kaufman. I hope it goes together easily so I can drop it off to them later this month.

Last Week’s To-Do List:

  1. Stitch appliqué flowers in place. ✔️ This step went much quicker than I thought it would!
  2. Prep Jawbreaker third project in #Journey2Nebula. ✔️ Ready for sewing.
  3. Lesson 2 with granddaughter, Pocket Organizer. ✔️ Lesson 2 & 3, the organizer is finished and super cute!

This Week’s To-Do List:

  1. Sew Jawbreaker into a pillow case, project 3 in #Journey2Nebula.
  2. Baby quilt!
  3. If there’s time, figure out next step in appliqué.

Linking to To-Do Tuesday hosted by Home Sewn by Us.
More Appliqué and More Projects!

Tuesday, September 29th, 2020

I’m still moving along on the appliqué pieces for the quilt I’m making for my son and his bride.

This past week I made flower centers.

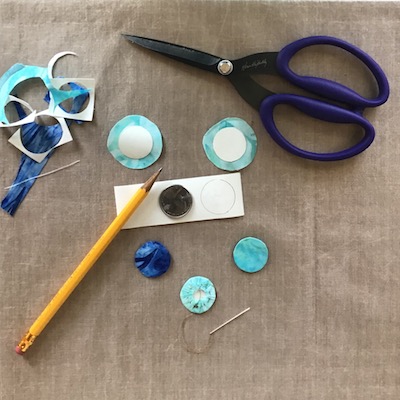
To make the circles I made freezer paper templates. I layered three pieces of freezer paper adhering them together with a hot iron. Then I traced a quarter on to the freezer paper, and cut out the circles. Adhered the circle templates to wrong side of fabric. Cut around the circle templates with a generous 1/4″ seam allowance. Using thread and needle, hand baste around the circle in the seam allowance. Pull the thread and it wraps around the freezer paper. Next I added some starch to the edges and pressed with hot iron giving me a nice fabric circle for the center of the flowers on the quilt. The freezer paper templates pop out leaving a nice fabric circle. Template can be used multiple times!

Plus I moved along in stitching the leaves in place, I switched from free motion quilting to using a walking foot.

I’m happier with the results. I stitched along the edges and then stitched veins in the leaves. Next up will be stitching flowers and buds in place.

Journey 2 Nebula, second project completed!

Lucky Charms, I made as a table runner instead of a pillow. Flange binding. Pattern by Jaybird Quilts.

A new project popped in this week. My granddaughter wants to learn to sew. We selected fabric to make a pocket organizer for her room.

She loves pinks and purples. Can you tell!?

The pocket organizer is going together faster than I thought it would! She sat on my lap at my sewing machine, so she could carefully sew the fabrics together. She learned placement of her hands to keep her fingers away from the needle. She loved pushing the button to cut the threads at the end of the seams, and figured out the knee lift to control the presser foot!  Here she is proudly showing family the beginning of her pocket organizer.

That’s progress on three projects this week. Rain is predicted for most of this week, so it should be a good week for more sewing.

Last Week’s To-Do List:

  1. Finish stitching leaves in place. ✔️ Slow going but completed!
  2. Prep flower centers, hope to start stitching flowers in place. ✔️Flower centers and buds made.
  3. Quilt & bind Lucky Charms #Journey2Nebula. ✔️

This Week’s To-Do List:

  1. Stitch appliqué flowers in place.
  2. Prep Jawbreaker third project in #Journey2Nebula.
  3. Lesson 2 with granddaughter, Pocket Organizer.

Linking to To-Do Tuesday hosted by Home Sewn By Us.

One Monthly Goal – August 2020

Saturday, August 1st, 2020

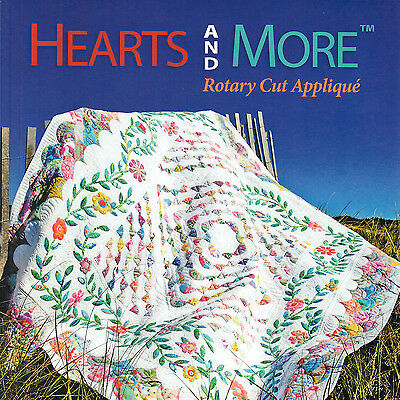
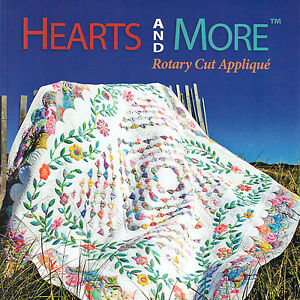
Last year I saw the quilt on the cover of Sue Pelland’s book Hearts and More displayed at a local quilt shop. Having promised a quilt to my son, Noel and his wife, Alicia, I thought this quilt would be something they would like. They stopped by the shop to look at the quilt and loved it.

I bought the book, templates & fabric the quilt shop had kitted for the Clam Shell quilt.

Hearts and More book by Sue Pelland.

I’ve not started that quilt yet! Honestly, I don’t think that’s a big deal as they have spent the last year gutting and remodeling their almost 100 year old house. No reason to have a new quilt in all that mess! Actually, they stayed with us during most of the dirty demo. Plus, most of their house hold items have been stored in our basement and garage for the past year. As rooms are completed, items have been moved back into their house.

It’s time. I want to finish the quilt by the end of this year, if not sooner!

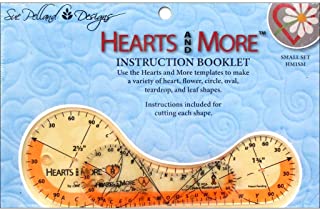
For August, my goal will be learning to use Sue Pelland’s Hearts and More Templates.


Plus I don’t want to do raw edge appliqué, so there will be some tweaking of the pattern on my part. Oh, and I need to enlarge the quilt for their queen size bed. Not too many changes to conquer, right!?

August goal – start Clam Shell quilt for my son and DILove! The center of the quilt is made up of Drunkard’s Path blocks. That is where I’m starting.

Linking to One Monthly Goal hosted by Patty of Elm Street Quilts.

Splish Splash

Tuesday, June 9th, 2020

Progress was made on the 2012 Craftsy BOM. All the blocks are sashed with a tone on tone white. Batting and backing cut.

Above is the pile of all 20 blocks from the 2012 Craftsy BOM.

Before I get to quilting the 20 blocks, I have to turn my attention to some baby quilts.

This quilt is sandwiched and ready for some quilting! I found the back at a quilt shop sadly going out of business.

The aqua hexie floral print goes nicely with the aqua and teals in the quilt. I was happy to find it!

I did find some fabric that I think will work for backs for the two Splash quilts, but not background fabric.

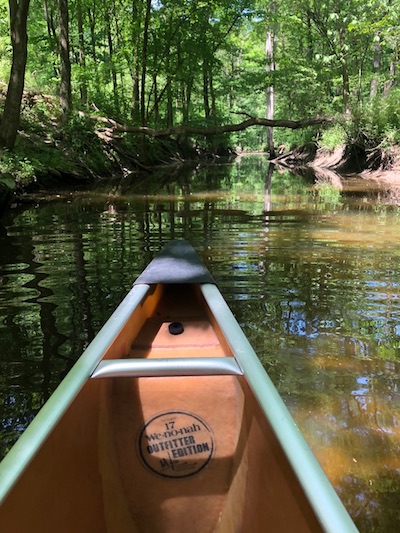
And while we are talking about splash-ing. Hubs and I went canoeing this morning.

We bought a used canoe yesterday and tried it out today. It is a light weight Wenonah at 40 pounds. It is so much easier to load, unload from our car top than our 83 pound Old Town canoe! Summer sunny fun days ahead!

This week, more shopping and sewing. And maybe canoeing!

Last To-Do List:

  1. Shopping! – back & binding for baby girl triangle quilt, – background, back & binding for 2 Splash quilts. ✔️Kind of. Didn’t find background fabric for the 2 Splash quilts.
  2. Make progress of baby girl quilt. ✔️ Back pieced, and quilt sandwiched.
  3. Finish sewing sashing on 2012 Craftsy BOM blocks. ✔️ Blocks all sashed.

This Week’s To-Do List:

  1. More shopping. I’ll try another quilt shop for the background for the Splash quilts.
  2. Quilt baby girl triangle quilt.

Linking to To-Do Tuesday hosted by Home Sewn by Us.
So Sewing

Tuesday, May 19th, 2020

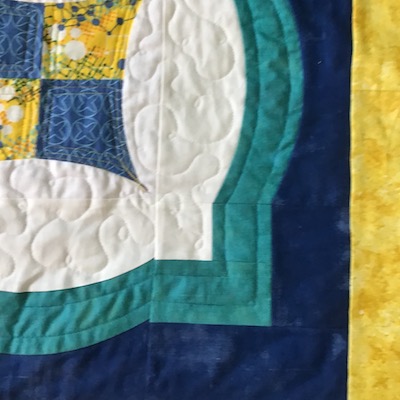
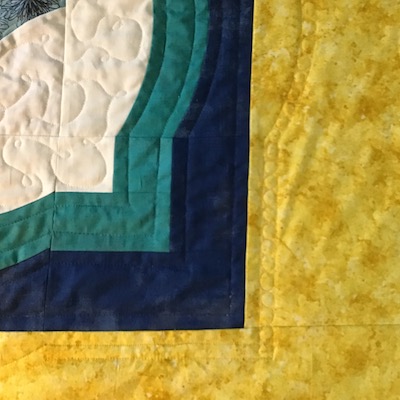
First up for this week was deciding on designs for the borders for Curve It Up.

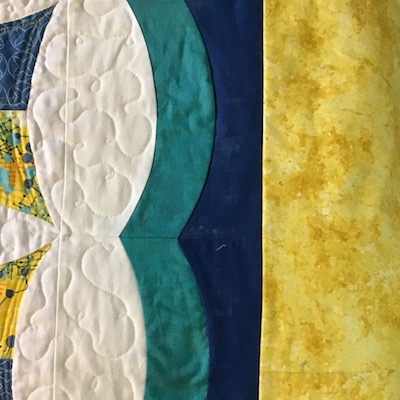
The borders according to the Curve it Up pattern by Sew Kind of Wonderful ended with the blue border above. Borders being the white, turquoise, and blue. My sister in law wanted a larger quilt, so she selected the yellow for a wide final border to make a queen size quilt.

I did a simple echo of the curves for the turquoise border.

For the blue border I continued following the lines of the seams. And then in the yellow border I repeated the curves in the two inner borders. I was adding pebbles/circles in-between the two lines of stitching when the bobbin ran out. On changing the bobbin the tension went all crazy. After much fiddling with the tension & rethreading everything, I had to walk away. I’ll get back at it later today. As of now, I plan to repeat the curves one more time, and then do matchstick quilting out to the edge. Those plans may change!
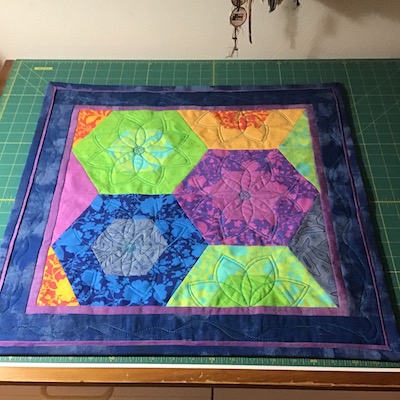
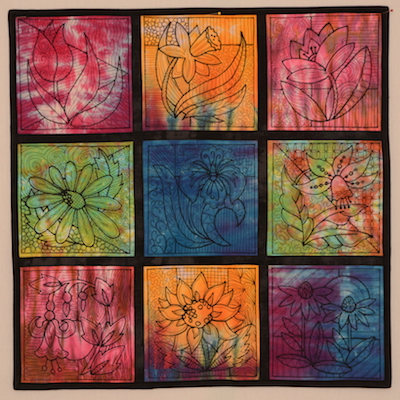
My Flower Power quilt is all bound and ready to display!

This was a free quilt-a-long hosted by Helen Godden. I used hand dyed fabric from Colorways by Vicki Welch. The sashing, back and binding are Moda. The quilt measures 25″ square. Black thread, Aurifil – until I ran out, then I switched to what I had on hand, an old Guttermann, and then Mettler. Having used all three brands on the same project, I can say Aurifil gets my vote. The others create way too much lint.

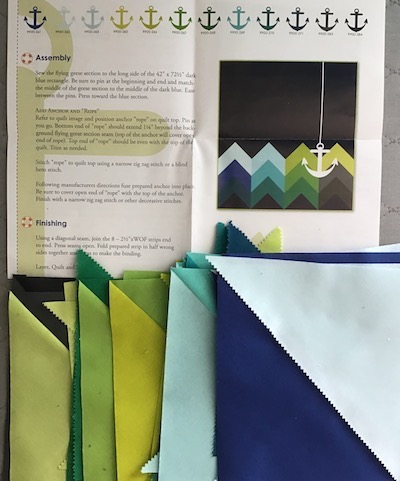
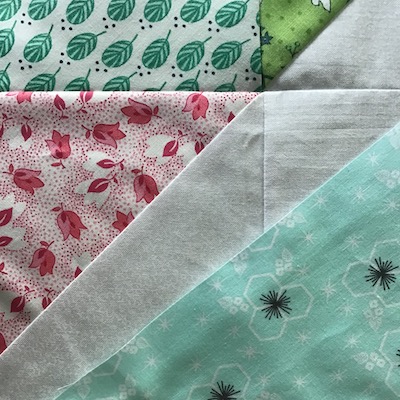
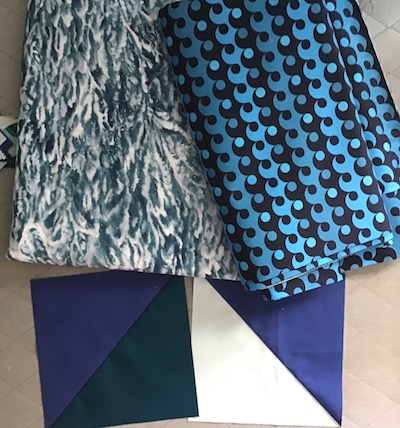
It’s allergy season here in the Midwest. Poor old me, and two of my children suffer greatly at this time. While having a sleepless night, I dug through some fabric looking for something to go with some embroidery blocks I had been working on. I pulled out a Moda precut – 10″ triangles they call Slice. What I didn’t know at the time was there was a pattern included with the pack of 48-10″ solids. The pattern is called Splash, and I thought would be perfect for my nephew’s baby boy. But I’ll make some alterations.

The pattern makes a 72″ x 78″ quilt. I figured if I cut the triangles in half, I will have a 48″ wide quilt and enough triangles for two baby quilts. The flying geese blocks are constructed for the two quilts, and waiting for the background fabric to complete them. Time to shop!

While digging in my fabric, I also found 2 more Moda Slice packs, but they did not come with patterns. I went to Moda Bake Shop where they have free patterns for all their precuts. Apparently Slice was not a popular precut as there are no patterns listed for the triangles. Basically Slice was just a Layer Cake cut on the diagonal. Anyway, I’m having fun with my Slice packs. Here is what I did with a Color Me Happy Slice pack.

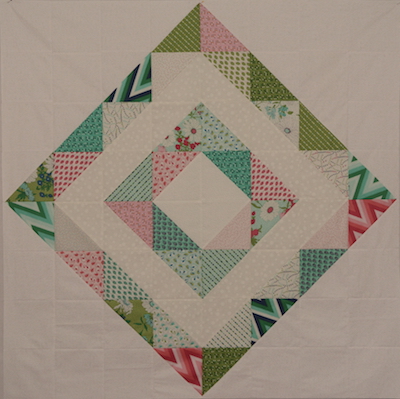
Again, I cut the triangles in half. They are paired up with various white-on-white fabrics to create HST and placed to give this on-point look. The quilt measures 48″ square and will go to my niece’s new baby girl. My shopping list is growing! I need a back and binding for this quilt.

I finished the two items on my to-do list, plus started quilting the final border on the Curve It Up quilt – until the tension problems, again, just like two weeks ago. Bummer. An I started three new quilts, not on the list. So! That is sewing progress!

Last To-Do List:

  1. Quilt Turquoise & Blue borders on the Curve It Up quilt. ✔️
  2. Flower Power – finish quilting and bind! ✔️

This Week’s To-Do List:

  1. Finish yellow border on Curve It Up quilt
  2. Shop again for background and backs – baby quilts in progress.

Linking to To-Do Tuesday hosted by Home Sewn by us.