Archive for the ‘Crafting’ Category

To-Do Tuesday, December 13, 2022

Tuesday, December 13th, 2022

Another week flies by as the end of the year approaches! December always passes too quickly in my opinion!

Here’s what I accomplished this past week in my little quilting world.

To-Do Tuesday, December 6, 2022

  1. Hopefully make progress on Homage to Grandmother’s Flower Garden. ✔️
  2. Now that I have a Christmas Countdown going – keep up with it!  ✔️
  3.  I’d like to say work on a charity quilt, but I don’t know if I’ll get to it. ✔️

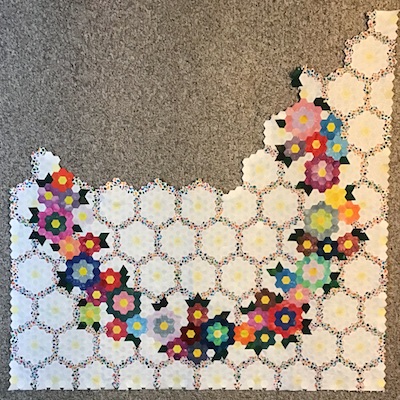
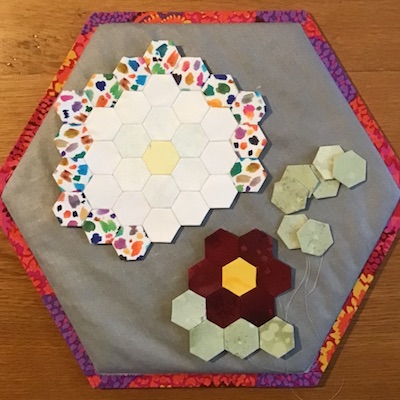
1. Homage to Grandmother’s Flower Garden – I did some stitching but not as much as I had hoped.

Week 35 is attached to the growing quilt.

And week 36 is under way. That is not a lot of progress as in one week’s time I like to stitch up a week and get it attached to the quilt. And start another week. Oh well. I hope to make up for lack of work on HGMFG this week as I have two quilting days with friends.

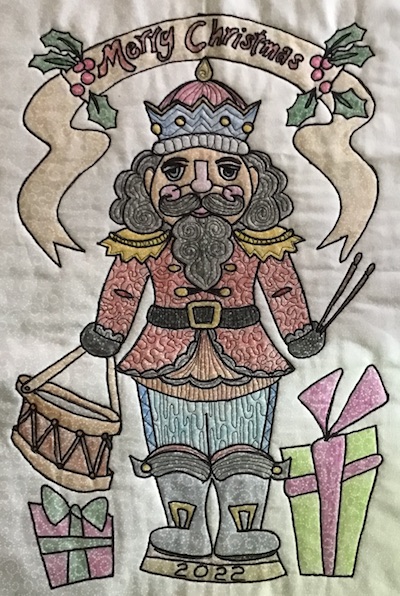
2. Helen Godden’s Christmas Countdown

I’m calling my Nutcracker Nutty and he is up to date with all the FMQ. Days 1-13.

3. Charity quilts

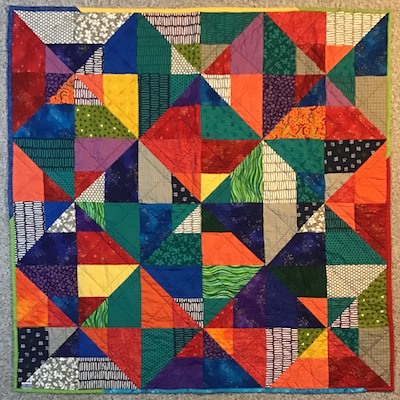
Quilt no. 1. I taught my DIL, Kim, how to grid quilt her finished quilt top using a walking foot.

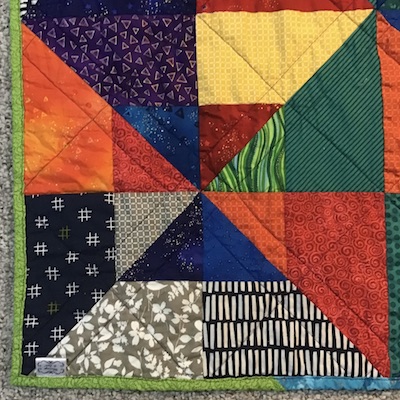
Scraps from my stash were used to create this colorful quilt. The grid quilting is one inch on both sides of the diagonal seams and then down the center of the blocks for stability.

Leftovers found in my binding box were used for a colorful binding. That makes one colorful quilt measuring 49″ square. This was one of 27 quilts donated to a local charity. We delivered the quilts for our Women’s Ministry group on Monday. Kim’s donations in the past have been knitted items. This is her first finished quilt! Although she does have several other quilt tops in progress!

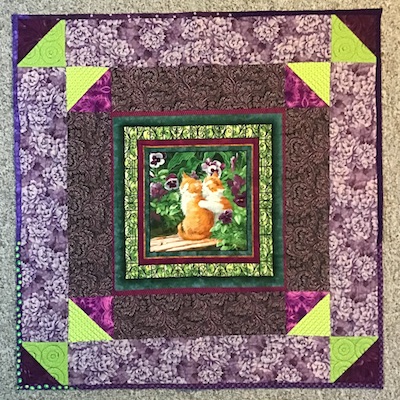
Quilt no. 2. I finished piecing simple borders around this cat panel.

Then my DIL had fun with FMQ. Her first go at FMQ! Nice job Kim! This will be a future hospice donation. 35″ square.

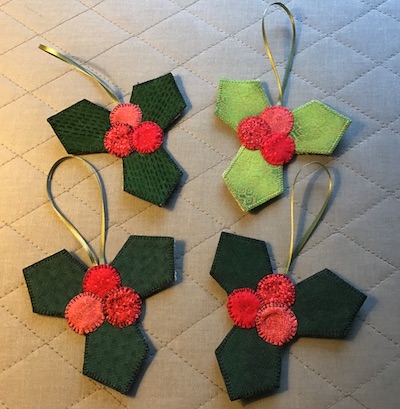
On to other creations – I have two Christmas parties this week with my quilting friends. We do a small gift exchange in both groups. I’m making little ivy ornaments to attach to the gift bags.

Four for Friday. I’ll photo the bags and share next week.

To-Do Tuesday, December 13, 2022

  1. Hand stitching Homage to Grandmother’s Flower Garden, EPP project.
  2. Meeting with two quilting groups, Wednesday & Friday. I’m taking the EPP project to work on both days!
  3. Keep up with Countdown to Christmas with Helen Godden.

Linking to To-Do Tuesday hosted by Linda of Texas Quilt Gal. Linda is stepping down from hosting at the end of this month. If you are interested in taking over this linking party, please contact her.
Progress … is Sometimes Slow

Tuesday, May 10th, 2016

I’m not sure where my mind was yesterday, but I sure had a dickens of a time sewing together this simple signature block.

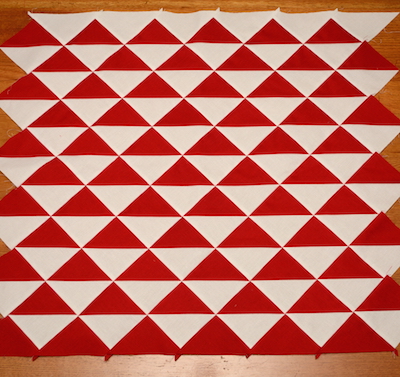
When I was calculating yardage and the number of HSTs I would need to make a 24″ square finished pillow, I totally forgot that the plan was to set the HSTs on point! The photoed piece is measuring 24″ top to bottom, which means I will have to add a bit of a border. Or, maybe not, will half of an inch matter when stuffing the pillow form into the pillow case? It will be 24″ square once I trim off the HSTs on the sides.

Feel free to leave your opinion in the comments on whether I should bother adding a tiny border to this piece. Would you add one, or not?

There is a red t-shirt that I am to use for the back of the pillow. I also forgot to buy velcro for the closure. To prepare the block for signatures, I will press a fusible interfacing on the back side of the HSTs block. I’ll use Pellon P44F, which is the weight I like for t-shirt quilts. The fusible interfacing will add just enough stability for writing with a Pigma Micron pen, but will also leave the pillow soft and comfy. I’ll quilt in the red triangles, or maybe in the ditch using a white thin cotton batting. I have scraps, so not sure of the brand name and will back the quilting with muslin. Once the pillow is complete with a t-shirt back and black piping, it will be washable and durable. I pre-washed the fabric, so there should be no color bleeding, always a fear with reds. I will instruct the owner to always wash in cold water and to use a Color Catcher to be on the safe side!

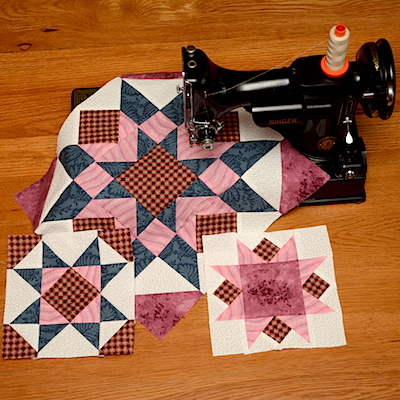
Today was another Curvy Quilters sewing day! I worked on a UFO, the Timeless Traditions BOM.

I finished the  2 – 6″ blocks and 1 – 12″ block for month 6. There are 7 more pieced blocks and 4 appliqué blocks to complete before setting them all together. Then borders and more appliqué. I hope to have this quilt finished for a Christmas gift. I told my Curvy Quilter friends we need to meet more than once a month so I can finish this quilt!

Cuteness alert!

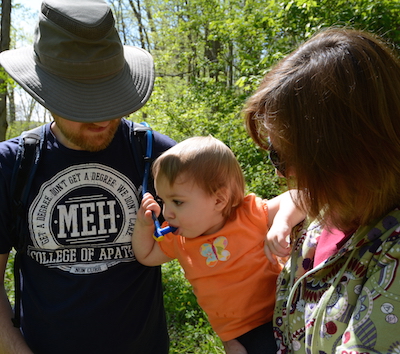
This is my 16 month old grand daughter learning to drink from a camel water pack! We had a delightful walk at a state park Sunday with most of our adult children joining us. But this is the only picture of the youngest in the family with her dad and me! I don’t know why we didn’t think to stage a decent family photo!

How did I do on last’s week To-Do List?

  1. Hobo bag made from t-shirts. ✗  Didn’t get to it.
  2. HST signature blocks – 24″ pillow with t-shirt back. ✔︎ Pieced!
  3. Setting aside Bargello to complete #1 & 2. Might get back to Bargello if time allows. If so – borders!

To-Do List for this week:

  1. Finish Signature pillow.
  2. Bind t-shirt quilt.
  3. Construct Hobo bag.
  4. Work on BOMs, Timeless Traditions, Machine Quilting Block Party, One Block Wonders if time allows.

Linking to To-Do Tuesday and Linky Tuesday.

Fabric Marbling

Wednesday, April 22nd, 2015

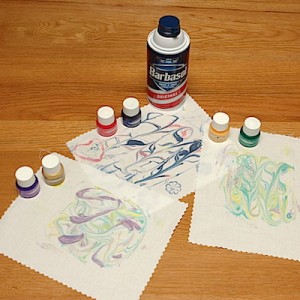
I got together with a friend and played with Barbasol Shaving Cream and Fantast/x All Purpose Inks. Here are a few of our pieces -

Simply spray some Barbasol on to a plate. Add a few drops of the inks in different colors. Use a toothpick to swirl the inks around. Lay PFD fabric on top of the shaving cream and ink, lightly press until you see the colors coming through the fabric. Peel fabric up off of shaving cream, lay on flat service and wipe off shaving cream with an old credit card, ruler, or squeegee. Allow to dry and then heat set with a hot dry iron. Your fabric is now ready to use a a project!

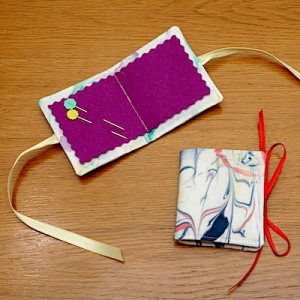
I used the fabric to make these needle cases. Aren’t they cute!?

Cut your marbled fabric into 2- 3 1/2″ x 5″ rectangles. You will also need a thin piece of batting that size. Layer the fabrics right sides together and place the batting on top. If you want the ribbon ties, cut two pieces each 7″ long. Pin the ribbon between the two layers of marbled fabric at the ends with the ribbons in the sandwich, making sure not to catch the ribbon in any stitching other than on the two ends. Stitch 1/4″ around the four sides of the layered fabrics and batting, leaving about 2″ opening on one long side. Trim corners. Turn the needle case right sides out through the opening. Press the opening seam allowance in 1/4″ and then top stitch around the needle case 1/8″ from edge. Cut craft felt or wool felt about 1/4″ smaller than the needle case. I used a pinking rotary blade for a decorative edge. Line up felt in the center of the needle case and stitch through all thicknesses down the center of the case, which will be the spine of the needle case.

I hope you enjoyed this little tutorial and find time to play with some fabric marbling!

Have you ever used PFD (prepared for dyeing) fabric or inks? What did you make?

I’m linking to Stitch All The Things To-Do Tuesday.

This week I plan on working on Dance of the Dragonflies, and cleaning out my sewing room.


This Must be What it is Like …

Sunday, March 20th, 2011

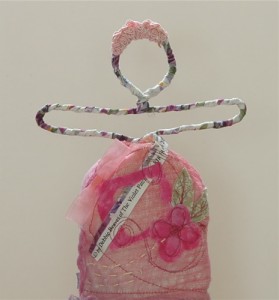
to have grandchildren visiting! I have not entered the wonderful world of grandmother-hood yet. But this past Tuesday I had the delight to have two little girls visiting while their mother ran a few errands. The first order of the day when these little ones visit is to play with  my cat. He soon scooted off to my studio and the “grand chase” was under way. Note that this is all normal behavior at our house! My cat loves to be chased and will keep the game going much longer than I care to play! The girls can stay interested in this activity about as long as the cat is willing to play! On this particular day, once in the studio, this little doll caught the eye of my 5 year old guest.

I took her down from her perch, and my little friend asked how she was made, which I explained, and then she asked if I’d teach her. For the next two hours, I kid you not! we three had fun rooting through my fabric, ribbons, bows, lace, beads, and other goodies and the girls each made their own doll, with just a bit of help from me (sewing) and my son (who bent the wire for us.)

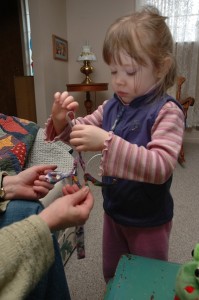
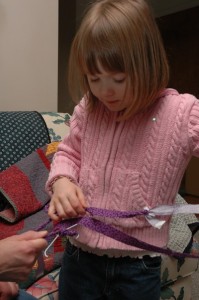
We wrapped fabric strips around wire  bodies, sewed up dresses, and embellished them with all the goodies the girls selected for their new dollies.

Wrapping wire body with fabric strips:

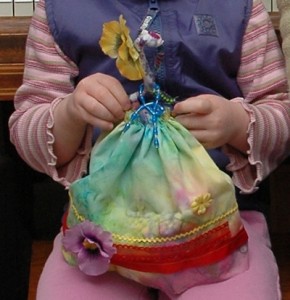
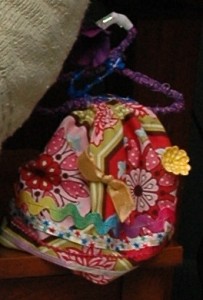
The finished dolls:


(photo above missing one camera shy little girl, and not the best photo, but oh well)

For the rest of their visit, the sweetie pictured played with the three art dolls, her older sister moved on to a doll house. And I watched them play while reading my new Cloth Paper Scissors magazine. These two very creative girls come by it naturally as their momma, Lisa Ransom Smith,  is a Pastels Artist.

Canvas Bag # 11

Wednesday, September 9th, 2009

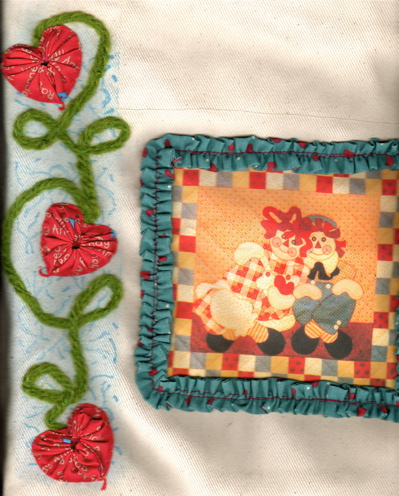
Crafting has been slow in my life lately. Seems most of my time is taken up in the life of my teens – new school year and all. Volleyball games and such, all fun! I did work on this canvas bag with the theme of Raggedy Ann and Andy. (Sorry the picture is not very good – it is a scan not a photo.) I added the yo-yo hearts, wool yarn vine, couched over stamping and fabric painting.  I’m new to yo-yo hearts and I found them easy and fun to make using Clover’s heart shaped quick yo-yo maker! I tacked them down with red embroidery floss. (Have you seen Calamity Kim’s amazing yo-yos?) I stamped the background with Fabrico craft ink in Cerulean Blue using side B of Stampendous! Texture Cube. Once dry, I color washed over the stamping with Lumiere Pearl Blue. Next I couched the yarn in place using the zig zag stitch on  my sewing machine and then added the yo-yos.

alteredcanvasbagsandynewI’m also working on the binding for the quilts for my parents (two twin size his and her quilts.) And having been inspired by Kim, I’m going to do more work on the yo-yos I’m sewing on to my mother’s quilt. I’m just stitching them in place now along with leaves around an appliqued vine. But I plan on going back and stitching them around the edges with floss. Don’t think I’ll add beads as it is a bed quilt intended for daily use. Thanks Kim for the inspiration!
Altered Bag # 10

Saturday, August 15th, 2009

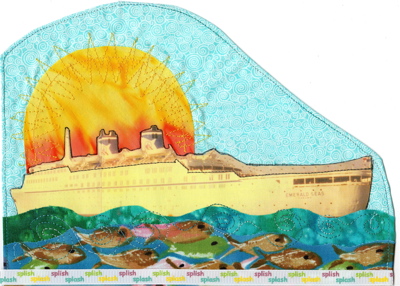
The theme for this bag is ‘travel.’ Mary included photos  and tickets printed on fabric of trips she has taken since childhood. I picked the photo of the cruise ship and had fun layering it with  fabrics and ribbon. I used fusible web and did some free motion stitching to hold the piece together. I outlined the ship with a Pigma pen and also did some stitching in a dark grey thread to add detail. This is what the piece looks like before adding it to the canvas bag. I have a tag that says ‘enjoy the journey’ that I hope to fit into the piece. It might have to be sewn on to another place on the bag as it is getting crowded!

alteredcanvasbagmarynew

Altered Bag # 9, Herbs

Thursday, August 13th, 2009

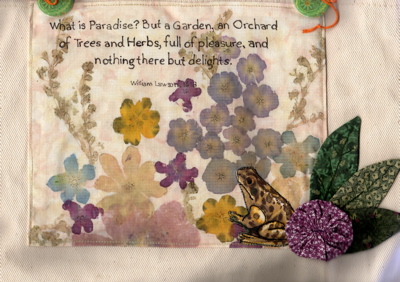
Since my last Altered Bag post I have received 2 bags to work on! The theme of this bag is “herbs.” I had purchased fabric with floral prints of sage, basil, thyme, etc. But the gal who worked on the bag before me used a companion print to it! So I dreamed up something else to add to the bag. While digging for fusible web, I found several pieces of flower pounding I made three or four years ago. Light bulb moment! I searched the web for herb quotes and found this one:

“What is Paradise? But a Garden, an Orchard of  Trees and Herbs, full of pleasures, and nothing there but delights.”  Wm. Lawson, 1618

I wrote the quote on the flower pounding fabric, added a frog in the corner with a yoyo and leaves. I think this fits the ticket! (The buttons were added by another participant.)

alteredcanvasbagcindynew

Another Altered Canvas Bag – Turquoise and Butterflies

Saturday, August 1st, 2009

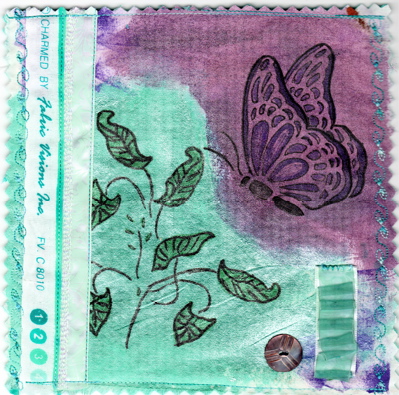
This little quiltie will be added to a butterfly theme canvas bag as a pocket. I used Lumiere paint by Jacquard in turquoise and plum. This is for a friend who loves purples and all things glitter. So I decided to try the Lumiere paint as a base, then stenciled the butterfly and leaves, coloring them in with fabric markers. I added a turquoise selvage edge, several ribbons and a button. In the upper left corner, can you read the word ‘charmed’ on the selvage? That word suits my friend!

alteredcanvasbagteresanewThis Altered Canvas bag swap should be winding down about now – bags are due back to their owners in September. But I have not seen the 11 bags I’m to work on! Looking over my past posts, I think I have only received and worked on 8 bags! Yikes! I wonder who is holding them up? I have three more bags to work on….
Generosity Project

Monday, June 8th, 2009

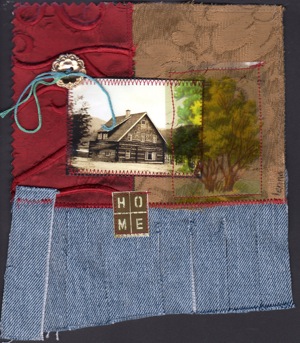
lennasgenerosityproject006In today’s mail I received this lovely fiber art piece from none other than Creative Lenna as part of her  participating in the Tapping into Generosity Project 2009. Lenna made the home theme for me because she knows of the 99% possibility that my family will be moving out-of-state due to my husband’s job search. She said in her note to me, “I know you don’t want to move … hard for everyone, but I think you will find a new “home” for you and your family.”
I know Lenna is right, we will find a new home. We will all adjust and life will continue with smiles on our faces. Thank you Lenna for the encouragement and the lovely fiber art!

Now, about the Generosity Project. I have linked to Lenna’s page which explains it, but I do not know who originated the idea. I followed several links, but it seems to go on and on! (If you know the origin, please let me know so I can give credit! Thxs!)   Here is how it goes: since I added my name to the draw on Lenna’s blog, I am now to offer a generosity meme on my blog. It is about making something with my own hand, from the generosity of my own little heart, and then giving that something to five people who comment about the project on this blog. The hope is that if you sign up for the drawing on my blog, or anyone else’s, you will continue the generosity meme by holding a give-a-way on your blog. Sounds fun! I I love the gift I received from Lenna so I hope I have lots of responses on my blog! I will randomly draw 5 winners next Monday, June 15th.

I have copied the following from Lenna’s page and it applies to my generosity meme :

“This offer does have some restrictions and limitations so please read carefully…
I make no guarantees that you will like what I make. No refunds… and no exchanges!!!! What I create will be just for you, and handmade with love from me. It will be created sometime in this calendar year (2009) and sent to you, and when you receive it, you will need to let me know it has arrived.

I will not give you any clue what it’s going to be. It will be something made in the real world that I’ll decorate and send to you through the US postal system. It will not be something cyber. It will be handmade, it could be any size, and it will be created from my heart in any medium I choose. I may take my time or I may make it quickly. I reserve the right to do whatever comes to mind when I create something for you!

The original meme requires you to post this text (or similar) into a note/blog post of your own and then make 5 things for 5 people who respond to it. I’m not going to require that of you. If you would like to do this generosity meme too, that would be great. I encourage you to participate and generously create, but it is not a requirement in order to enter and win.” This meme does not have to be an art or craft – we are all creative in our own ways. I do hope you will join me in this! Leave a comment and I will get back with you on June 15th. You will have to leave a way for me to contact you and a mailing address if you win.

I have no idea what I will create – a quiltie?  – some felted piece?  – or applique? But I am looking forward to this project! Hope you join me!

Row Houses

Monday, September 15th, 2008

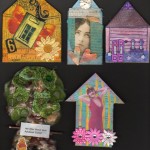
I received my lovely set of row houses in the mail September 8th from Lenna’s swap. Houses are from Vickie Jones who made an ever-so-clever Winnie the Pooh tree house, Joanie Hoffman created a cottage in purples and pinks, Lisa Mallette (Studiorose) created the sunbathing beauty, Teri Calia (catnip designs) created A Taylors House – the lovely gold one, and Janice Perkin created the tall thin dream house. Thank you ladies! I love them all.

Row House Swap

Row House Swap