Posts Tagged ‘To-Do Tuesday’

Cast Iron Cooking

Tuesday, July 14th, 2015

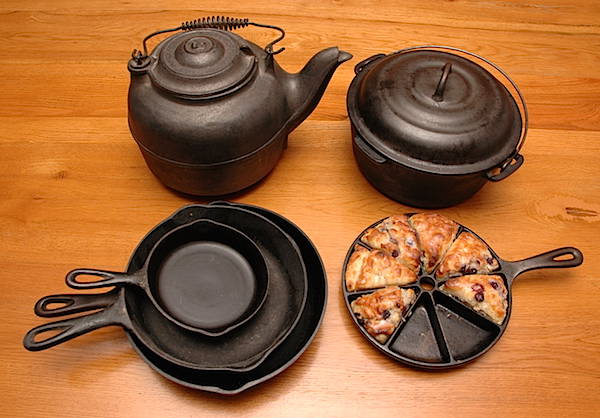
This past week I stumbled across a Cast Iron Cooking Facebook group. I’ve been hanging out there a bit reading recipes which inspired me to pull out my long neglected cast iron and give a few of the recipes a try. Up to this point, I really only used the 10″ skillet and scone pan for cornbread. I dusted off the dutch oven & roasted up a rather tasty chicken on a bed of herbed rice. And that scone pan? Actually used it for blueberry scones that turned out wonderful! Family raved!

I forgot to take a picture of the scones until after my son and I had each eaten one of them! Yummy!

Thursday, a few friends are coming over for a sewing day. I’ll be making another batch of the scones to share. Can’t wait!

I’ve not gotten to any quilting this past week, but Thursday I plan to make progress on my Paradiso paper pieced blocks. I did play around with a shoulder bag design using a t-shirt and yardage. Not finished yet, so photos next time!

This coming week I want to: Finish up the shoulder bag. Work on some Paradiso blocks. Pack for a trip hubs and I will be taking once his summer session ends later next week.

Are any of you Cast Iron Cooks? Do you have a favorite piece or recipe? Hope you have a good week!

A Little Bit of Garment Sewing and Linky Parties!

Tuesday, July 7th, 2015

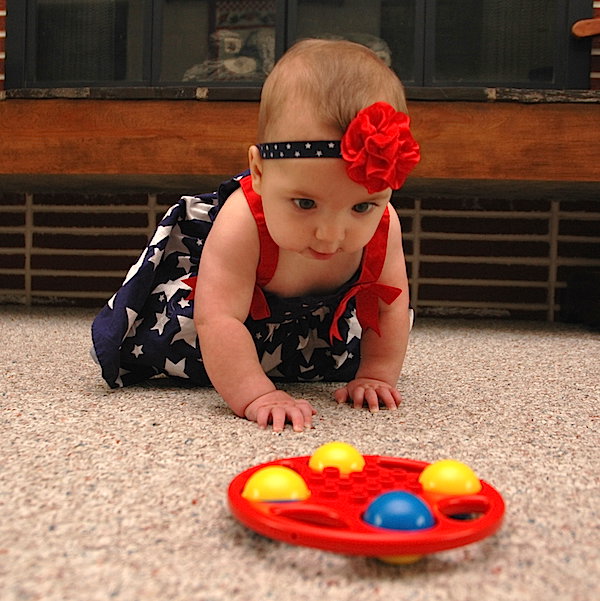
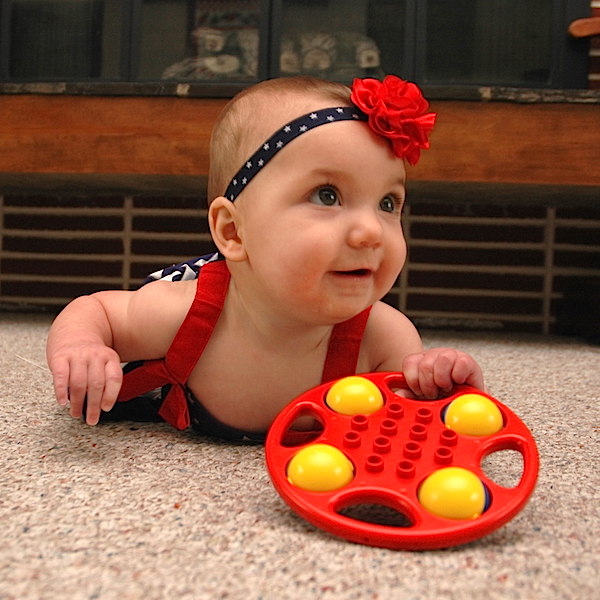
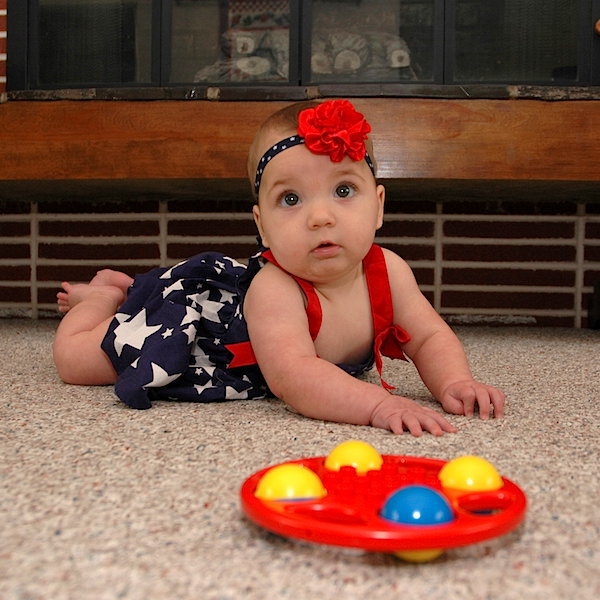
First up, the cutie grand baby is just about crawling! She is adorable, if I say so myself! She and her parents came for a visit on the 4th of July, Independence Day here in the USA.

You think I should try and get that toy?

Determination!

Got it!

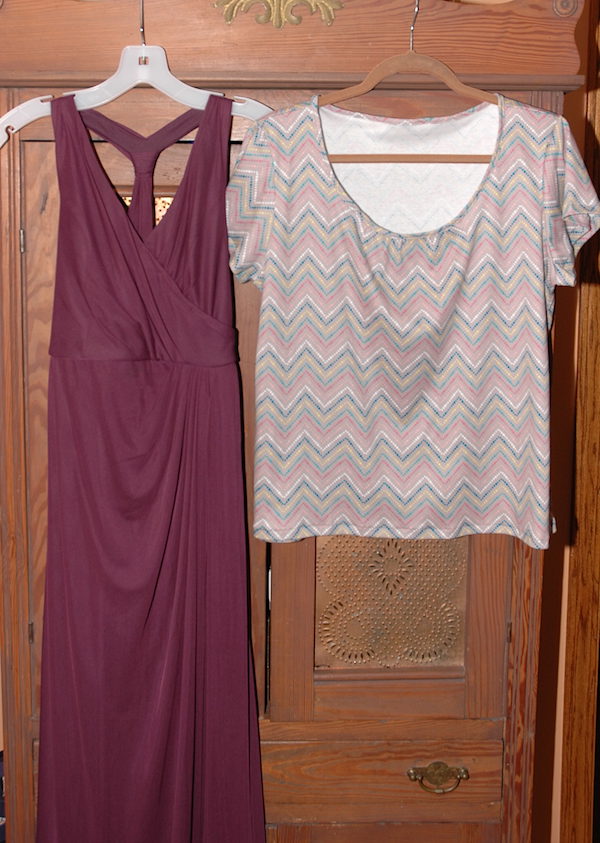
I did a little garment sewing this week. I hemmed a bridesmaid dress for my daughter. Hope she likes it. And I took apart a favorite t-shirt to use as a pattern to make a new one for myself. It is ok, considering I didn’t have pattern instructions to follow. I did a lot of guessing and practicing on fabric scraps.

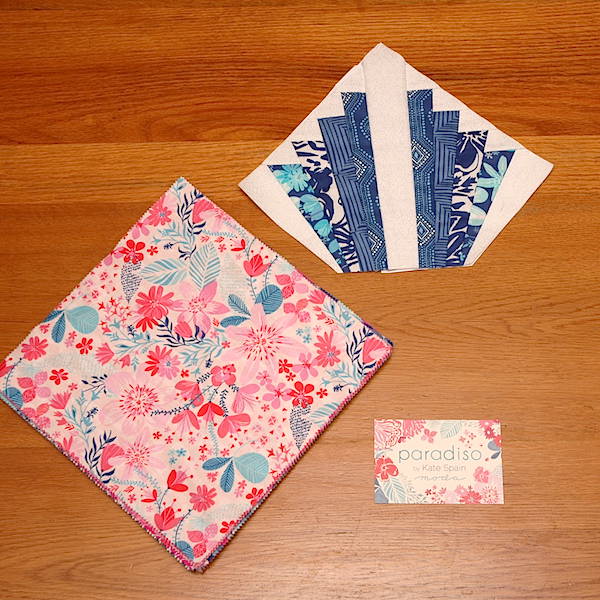
With both of these projects complete, I think I’ll stay away from knits for a while and stick to woven cottons! Something like a little paper piecing with Kate Spain’s Paradiso fabric line.

How about you? Do you like garment sewing?

This week I hope to continue working on the Paradiso quilt. Plus meeting a customer who wants some hobo bags made out of some clothing that is sentimental to her. I spent time today looking for hobo bag patterns and have 3 to show her later this week when we meet up.

I’m linking to To-Do Tuesday and Linky Tuesday.

News Flash! I just went over to Connie’s to grab the link to her Linky Tuesday and am pleasantly surprised that she has shared my Mr. Juggler from last week’s link up! Thank you Connie! I am honored!


“J” is for Juggler, part 2

Tuesday, June 30th, 2015

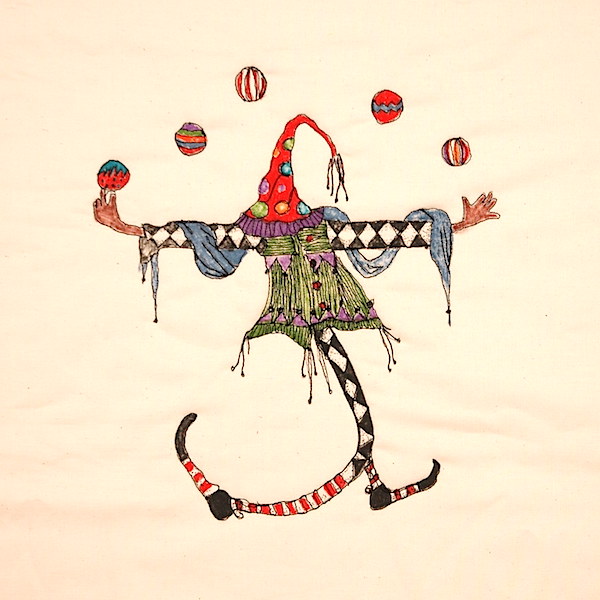
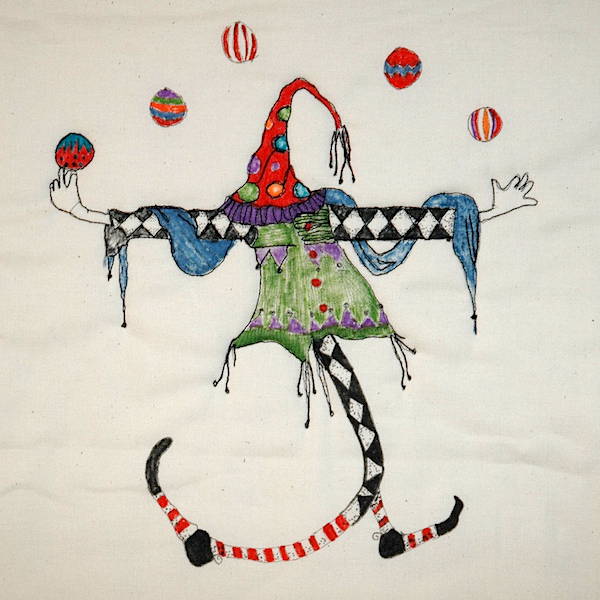
Here is my Mr. Juggler all stitched up.

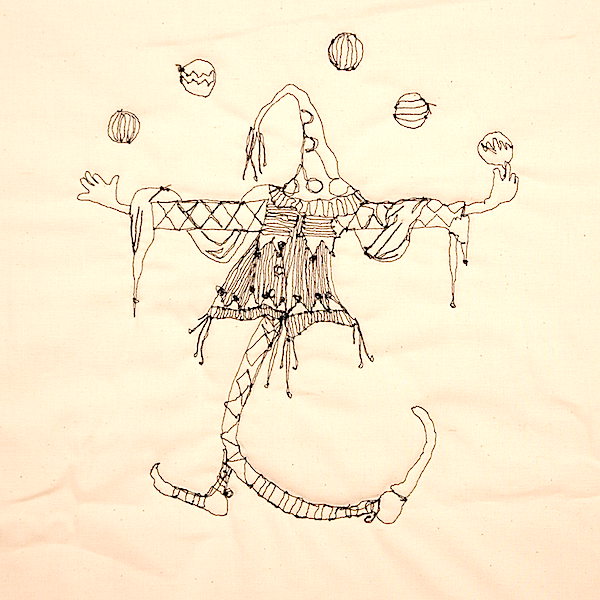
I’m having just a bit of an issue with my new Janome for free motion quilting. My stitches are a bit jerky. You can see how they are out of whack on the back of this piece:

I’ve got to fiddle with the machine’s tension, maybe get a Supreme Slider, and practice! Even so, I do love Mr. Juggler. He is an illustration by Pam Holland used in the workshop I took from her June 21st at Cotton Corner in Shipshewanna, IN. He might be turning in to a pillow, not sure yet. I’m thinking prairie points and pompoms would suit him.

Last week’s quilt show in Shipshewanna was a blast! What a fun get away with several friends!

This week I have to get to that bridesmaid dress and hem for my daughter. That, and playing with some new purchases from the quilt show is all I’m putting on my To-Do Tuesday list.

I’m linking to To-Do Tuesday and Linky Tuesday.

“J” is for Juggler

Tuesday, June 23rd, 2015

Sunday, I had the privilege to take a Pam Holland  class. The workshop was held at Cotton Corner in Shipshewanna, IN.

It was a lovely day and an even better experience. Pam is an excellent instructor. Pam showed tons of her lovely thread painting quilts and what she calls ‘drappliqué’. Drappliqué is drawing and appliqué combined that is stitched over with thread.

Pam has a self-published book The Adventures of the Amazing Alphabet, which is a story she wrote for her grandchildren and also a quilt book sharing her drappliqué technique. Patterns included for each letter of the alphabet.

At the workshop, Pam provided a copy of her letters ‘A’ and ‘J’ for her students to use to work through her techniques. I selected the letter ‘J’.

My Mr. Juggler is not yet complete. I still have lots of thread stitching to do. But I was so excited about this project, I just had to show you, and encourage you to take a Pam Holland workshop if you can!

This week’s to-do list includes going to the Shipshewanna Quilt Show for a couple of days with some dear friends! Sewing might happen over the weekend.

I’m linking to Linky Tuesday and To-Do Tuesday.

Learning Curve

Tuesday, June 16th, 2015

I’ve been trying some new-to-me quilting techniques while working on this little Paper Pieced Flower Pot.
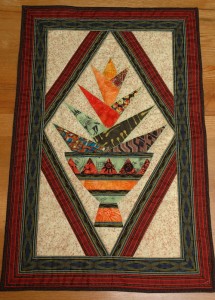
I signed up for Cindy Needham’s Design It, Quilt It class on Craftsy. She recommends ditch stitching ESS Every Stinking Seam. She also recommends using Superior’s Bottom Line 60 wt thread for ESS. After all the seams are ditched, then she does her free motion quilting (FMQ) design.

I bought a sample pack of thread from Superior Threads last year, but never opened it up.
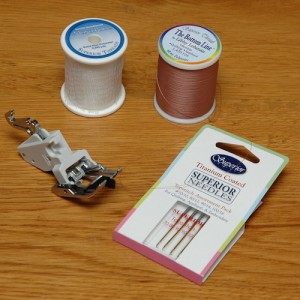
Today, I got it out and there are several of the types and weights of threads Cindy is using in the class. I filled a bobbin with Bottom Line #637 which just happened to be a great match for the back of the quilt. I used MonoPoly a Monofilament thread (Not recommended by Cindy, but I had it, so why not play with it?) in the Titanium Coated Topstitch needle #70/10 that also came in the sample pack. Superior says these needles last much long than standard needles. I’ll be happy to test that out!

To do ESS I switched out the 1/4″ presser foot for my new Acu Feed Stitch-in-the-Ditch Foot.
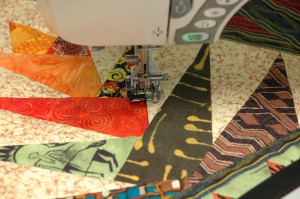
Following Cindy’s advice, I stitched in every single seam. It was easy with the seam guide on the Acu Feed foot and this project was not that large. I think I’m going to love the Bottom Line thread. I’ve never sewn with 60 wt thread before, it is so thin.

Next up was the free motion quilting. I kept the Bottom Line in the bobbin but used Master Piece in the needle. Superior says it is for PIECING but hey, the color was right, so I went for it. There was a bright green #128 in the sample pack that I thought would look good, but only did a tiny bit of FMQ. I’m just not sure how to quilt this little potted succulent. I moved on to some decorative stitching along the leaves, and the Master Piece 50 wt was good for that too.

The small wall hanging (20″ wide 31″ long)  was finished with yet another new-to-me technique. I used a Flat Felled Foot to attach the binding.
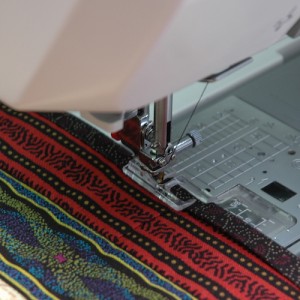
See the little hook type thing on the front left of the foot? It slips under the binding to guide it in place for stitching.
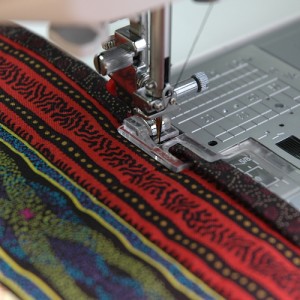
Above, the binding feeds over the ‘hook’ for nice even stitching.

I saw the technique on A Woman A Day blog: Happy Feet Quilt Binding by Lisa Yarost. Hmmm, maybe I saw it first on Pinterest. This was my first time to use the Flat Felled Foot and the results are not perfect, but I do like the method and will use it again. I didn’t read her article carefully and actually sewed the binding back to front instead of front to back, as she suggests. I was glad I switched it because the stitching is kind of off in places on the back. Which would have been the front, which I would not have been too happy about. On the back, it is ok as it is not as noticeable.

This was a paper piecing project from the book Paper-Pieced Flower Pot Quilts by Anja Townrow.
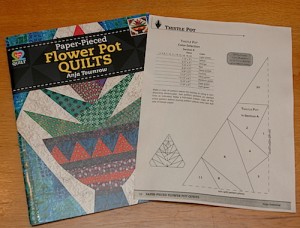
Critique: Cute designs, nice-ish directions for the paper piecing, but there are no instructions for how to put your potted plant into a quilt. Even though Anja shows each pot in several quilts, for some reason she didn’t include any yardage or piecing instructions for the little quilts in the book. Maybe I’m missing something?  I just winged it. Only attempt these projects if you are confident in paper piecing and like to play with settings!

How about you? Have you made anything with paper piecing? Do you have a favorite method?

Next up is hemming a bridesmaid dress for my daughter, and helping her make wine bottle bags for an upcoming bachelorette party.

I’m linking to To-Do Tuesday and Linky Tuesday.

I’ll be doing a demo at Fabrics and Friends Quilt Shoppe in Roanoke, IN Saturday, June 20th on paper piecing.
Easy Piecing

Tuesday, June 9th, 2015

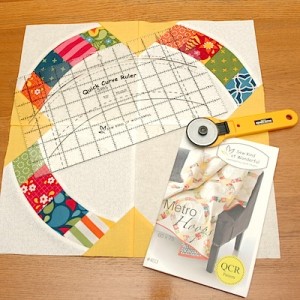
I pulled out a quilt that fell by the wayside last Fall. The pattern is Metro Hoops by Sew Kind of Wonderful. I used Best Day Ever, Designed by April Rosenthal,  Jelly Roll by Moda.

Piles of pieces just cut, and waiting for the next step.

One block complete. I think it is going to look great!

Last week’s paper piecing needs borders. I have to get more fabric. Sigh, another trip to the quilt shop. Just kidding! I love going to the local quilt shop! Fabrics and Friends in Roanoke, IN. I’ll post a photo next week. I just watched a video today on a technique called No Tear Paper Piecing that uses freezer paper. I want to try that out and can see modifying how I paper piece in the future. Thanks Quilt N Bee Quilt Shop!

This week I hope to finish both the paper piecing and Metro Hoops.

I’m linking up to Linky Tuesday and To-Do Tuesday.

Happy Sewing!

Finishes

Wednesday, June 3rd, 2015

Finally! 3 finished tops this week! They have been a long time coming!

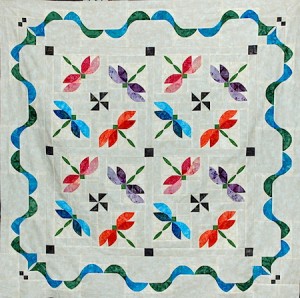
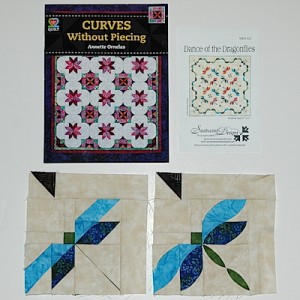
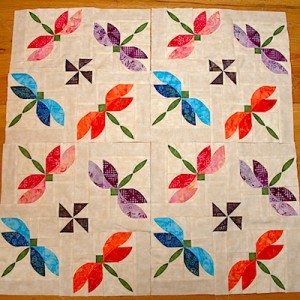
Dance of the Dragonflies, a Southwind Designs pattern. This was made for Fabrics and Friends Quilt Shoppe owner, Deb Roehm. I’m hoping to show the technique as a demo sometime in the future at the shop. Perhaps a quilt from the Southwind Designs line could even be a future class at Fabrics and Friends.

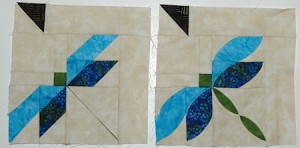
The block is sewn together using squares and rectangles and dimensional squares folded diagonally and stitched into the seams. Once all pieced, you go back and fold the dimensional pieces and stitch the curves in place. The technique is a bit time consuming, but gives a nice finish affect!

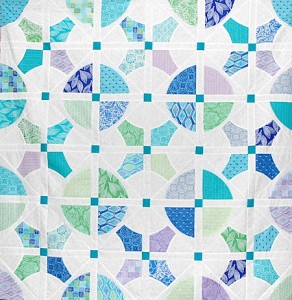
This is Dot to Dot, a pattern using the Quick Curve ruler from Sew Kind Of Wonderful. I have to tell you, I love that ruler! This is the third of four quilt tops I have completed with the Quick Curve ruler. Plus I’ve sewn up several other blocks from their pattern line for demos at Fabrics and Friends Quilt Shoppe, Roanoke, IN. I used Moda’s Horizon by Kate Spain Layer Cake for the prints. I’ve made one for the shop and will be making one for me too! The top is 56″ square. You only need 18 – 10″ print squares for this size top, so that means 2 from one Layer Cake, plus pieces left over to use for demos.

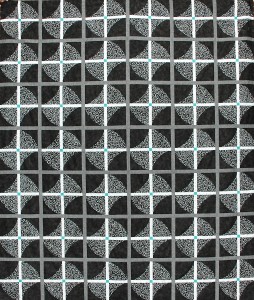
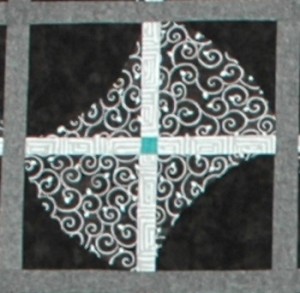
This quilt top started from another Sew Kind of Wonderful pattern called Two-Step Topper that I more than quadrupled in size. The original pattern was a 30″ square but designed with no sashing. I went sash happy, dividing the Drunkard’s Path type units with a tone on tone white with a pop of teal in the center. Then I sashed those blocks with a gray linen. The top is now 70″ x 80″ and is going with my daughter to college in the Fall. She picked out  Follie, a lovely white, black, and teal  print by Lotta Jandotter for Wyndham Fabrics for the back.  And she wants a black binding.

Close up of the fabrics.

I’ll be linking to Linky Tuesday and To-Do Tuesday if the links are still open.

I’m also linking to Vicki’s UFO Busting Link Up.

Next up is a paper piecing project.

Dragonflies, Rick Rack and Rectangles

Tuesday, May 19th, 2015

The Dance of the Dragonflies is getting there, but not done yet! I picked out the fabric for the borders, but have not gotten to any cutting or piecing on the project this past week. I did get all the little curves stitched down. This is a pattern by Annette Ornelas of Southwind Designs.

Above photo shows the Dragonfly pieced on the left, and curved stitching on the right.

In above photo you see all the dragonflies set together waiting for sashing and borders. Hopefully the wait will end this week!

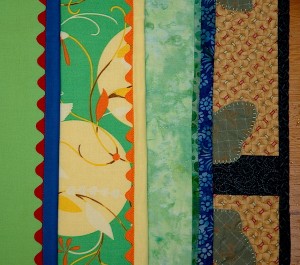
Moving on to Rick Rack! Have you made binding with the Rick Rack method? The Rick Rack is sewn down the center of the binding, press binding in half, then sew to the back of the quilt. When you turn the binding to the front of the quilt, the Rick Rack now shows on the front and you stitch in the ditch between the it and the binding.

Above photo shows 2 pieces with Rick Rack Binding, next is a Flange Binding, and far right is a traditional binding.

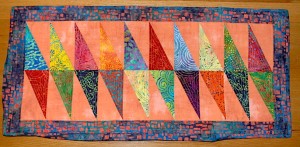
Another work-in-progress is this Rectangle Tablerunner. I used Calypso Batiks and Moda Grunge. Bloc-Loc Ruler for squaring up, and a traditional binding because I thought the prints already had a lot going on with out adding a Flange or Rick Rack. I still have some hand stitching to complete the binding.

I’m linking to Linky Tuesday and To-Do Tuesday List.

Happy Stitching Gals and Guys! And as you finish up a quilt this week, what type of Binding will you be using? Do you have a favorite?


Flannels and Featherweights

Tuesday, May 12th, 2015

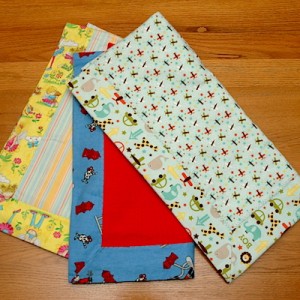
Self-binding Baby Blankets are my current ‘go-to’ for baby showers.

Here are just a few, made from two coordinating flannels.

Fabrics and Friends Quilt Shoppe just got in a shipment of Riley Blake Flannels. The top/right blanket are Riley Blake. The other 2 blankets are older prints, I don’t know the manufacturer.

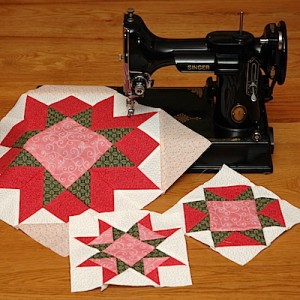
Tomorrow is Featherweight Club at the quilt shop. Here are last month’s blocks.

The club meeting sneaks up on me ever month! I just made the blocks yesterday. So much for avoiding last minute to sewing!

Not photoed is the table runner I free motion quilted but still have the binding to tack down. And also the Dance of the Dragonflies is almost complete! I cut out the border pieces today. Pictures promised next time!

I’m linking to Linky Tuesday and To-Do Tuesday.

This week’s list will be binding the table runner and finish piecing Dance of the Dragonflies. I know, I listed them last week, but successfully worked on both, even tho not complete! I had forgotten about the Featherweight Club and then had a few baby blankets that needed to be made. That is life, right!?


Playing with Bloc-Loc

Wednesday, May 6th, 2015

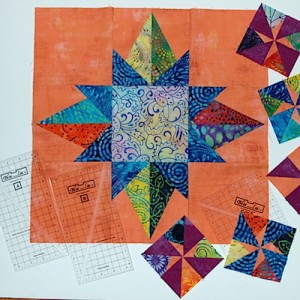
Fabrics and Friends Quilt Shoppe in Roanoke, IN carries part of the line of Bloc-Loc rulers. This week I’ve played with the rulers for Half Rectangle Triangles and also Half Square Triangles. These are handy little rulers that help with squaring up rectangles and squares for accurate piecing.

They are a bit pricey but, I do recommend adding them to your selection of quilting tools. I have found myself grabbing the ruler for HST often, as it is very useful for trimming multiple sizes of HST. I own the 5 1/2″ HST Ruler. This week I have added the 4 1/2″ x 8 1/2″ HRT set to my favorite tool list. I also want to purchase the set of Flying Geese rulers, as I have borrowed a friend’s. The Flying Geese rulers are useful for trimming other units than just geese too!

BTW, the little 4 1/2″ blocks in the photo are all made from the trimmings of the larger blocks I made. The large block is 16″ finished.

Previous To-Do List:  ✔︎Dance of the Dragonflies (pieced),  ✔︎cleaning out my sewing room (rearranged)

This weeks To-Do List:  Finish Dance of the Dragonflies, quilt table runner – pictures of both to follow.

Linking to To-Do Tuesday and Linky Tuesday.
Do you use Bloc-Loc Rulers? What are your favorite go-to tools for quilting?