Quilting a Baby Quilt
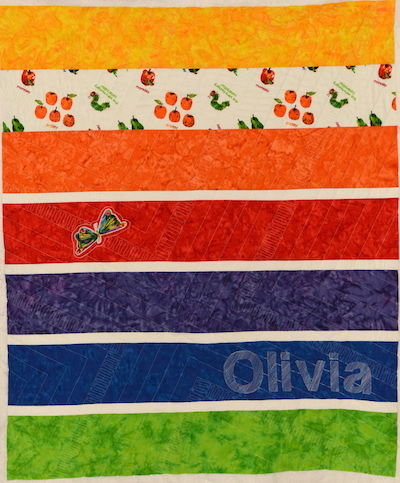
I pieced this baby quilt a while ago. I only had a small amount of The Very Hungry Caterpillar fabric left from a previous gift, and wanted to figure out a way to make good use of it for another baby quilt. So I pulled out my brights and cut 6.5″ strips and sewed them together with a narrow band of a white print in between.
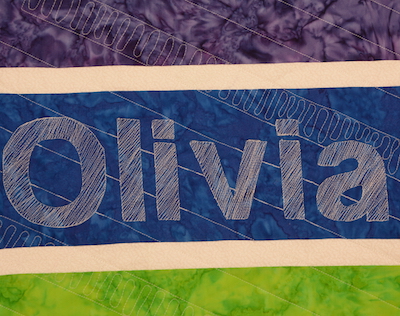
Next up, I wanted to add the baby’s name, but had not decided on just how to do that. What I ended up doing was printing the name out in a large font, cutting the letters out, and tracing around them. Then I stitched around each letter. I didn’t think of taking a picture of the first couple of steps, oops!
Next, I used the walking foot and added straight lines for the over all quilting.
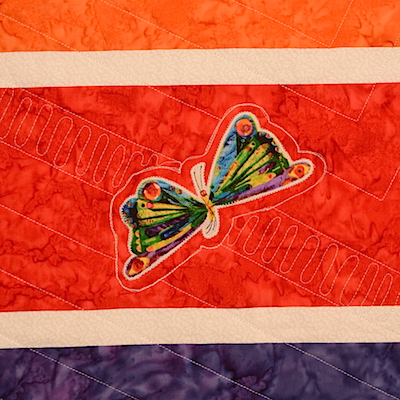
When my straight line quilting approached the appliquéd butterfly, I stitched around it until reaching the spot on the opposite side of the butterfly to continue the straight line quilting.
After stitching straight lines in four quadrants, I went back and did a FMQ ribbon in-between some of the straight lines. The straight lines are stitched 1.5″ apart.
I wish I had taken a picture of the name before deciding to fill it in. When filling in each letter, I tried to keep the FMQ lines perpendicular to the over all straight stitched lines.
Below is a close up of the three types of quilting used in the quilt.
- Back ground straight line quilting set at a diagonal, and off set, so they are not meeting in the center of the quilt.
- FMQ ribbon quilting
- Filling in letters with (somewhat) perpendicular lines to background quilting
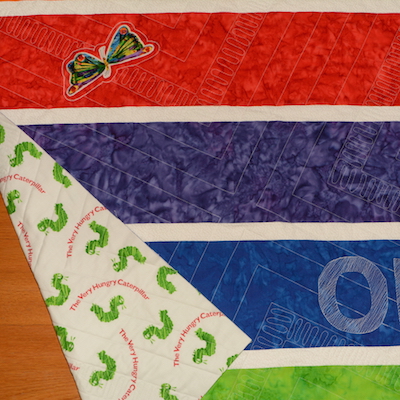
The back of the quilt is The Very Hungry Caterpillar fabric that I found at a LQS. I was so happy to find yardage to coordinate with the little bit I had on the front! But it took running to 2 stores before I found it!
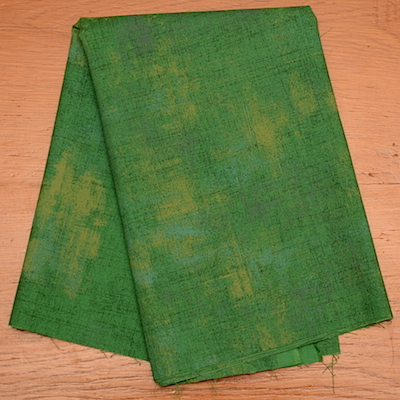
I plan to bind with the above green Moda Grunge.
This was a fun creative project. Starting with a scrap of The Very Hungry Caterpillar fabric, and then playing with ideas for the quilting. I have The Very Hungry Caterpillar board book to also give with this quilt, and my daughter has ordered TVHC stuffed caterpillar to add to the gift. The stuffed caterpillar should arrive this week, with that and the binding complete we will be ready to visit and gift the new mother and baby Olivia!
How has your creative process been this week? I’m happy with how this quilt is turning out!
How did I do on last week’s To-Do List?
- Bargello quilt – finish borders & start appliqué ✔︎ Borders on, and getting appliqué in order
- quilt baby quilt ✔︎ quilted!
To-Do List for this week:
- Bind baby quilt
- Enlarge and cut out appliqué pieces for Bargello quilt
I’m linking to To-Do Tuesday and Linky Tuesday.
August 17th, 2016 at 16:55
Sharon, this is brilliant! I absolutely love how you quilted the name on it. I am saving that idea for future reference. I really like the texture the straight line and ribbon quilting give the quilt too. A big Yay! for finding more Hungry Caterpillar for the backing. Also, super love the Grunge. Fantastic quilt!!