
I got all the mud sanded today.
The I primed the drywall. See, those numbers above are the prime numbers. Get it?
I got all the mud sanded today.
The I primed the drywall. See, those numbers above are the prime numbers. Get it?
I mudded the walls over the last few days. Earlier in the week, I thought that I’d also get the floor laid. I decided to wait on the flooring until the mudding was finished and sanded. Hopefully, that will happen on Monday. I also did some smaller tasks such as mudding one 4′ x 8′ panel in the garage, changing the oil in my two cars, replacing the brakes in my van, helping Noel work on his car, balancing the checkbook and paying the bills, etc.
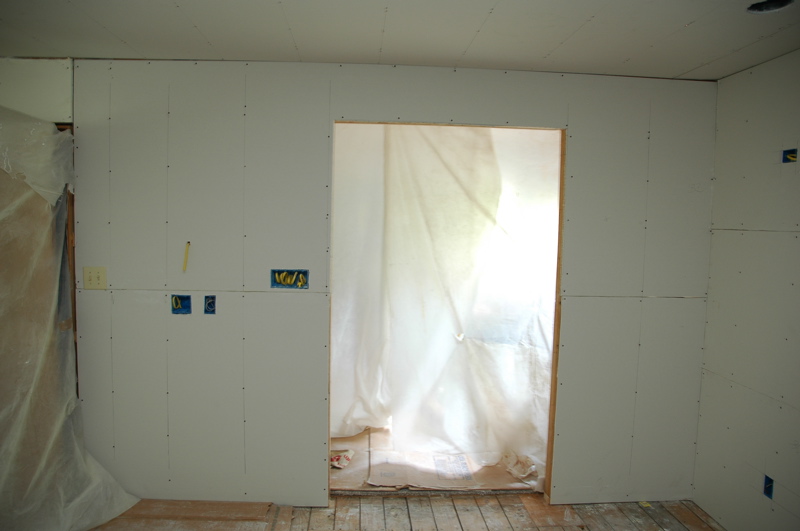
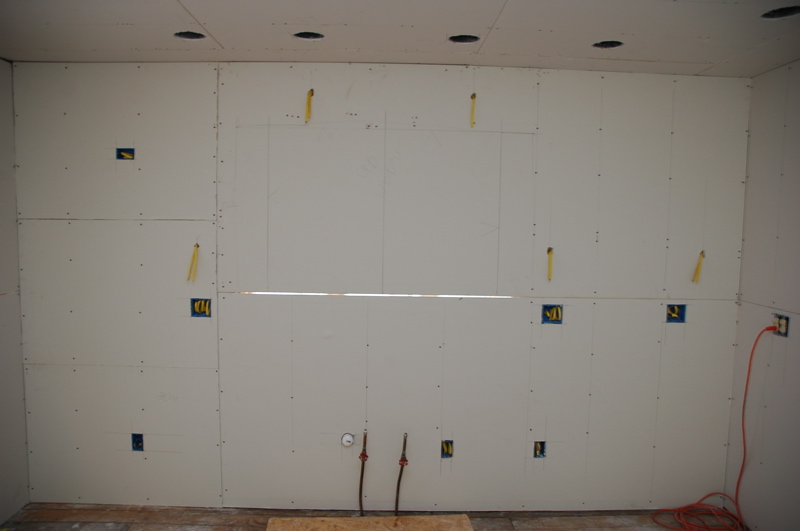
Yahoo! As Luke said today, “It’s really starting to look like a kitchen!” I finished the drywall last night at about 9:30 p.m. Here are the pictures looking S, W, and N.

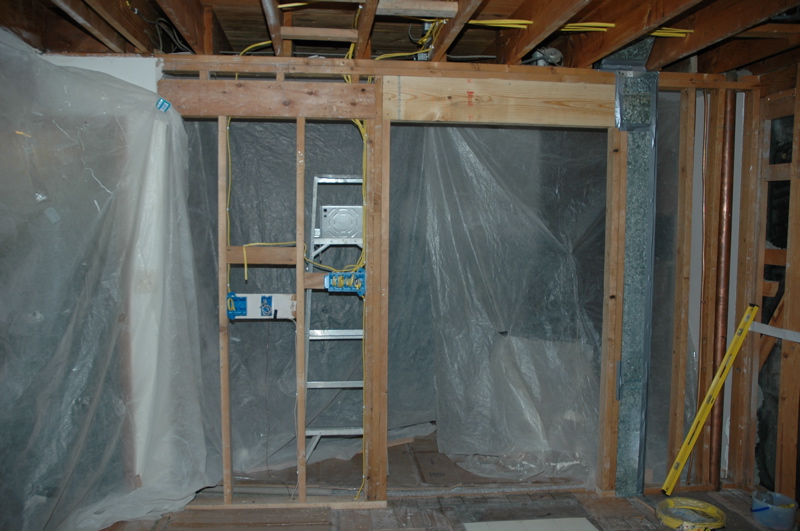
Today I got the first coat of mud on the drywall. Then Sharon reminded me that there was a second side the S wall. I was going to leave it open until next year when I gutted that room. But, it wasn’t much of a problem to hang drywall on it. I won’t finish it until I gut the rest of the room.
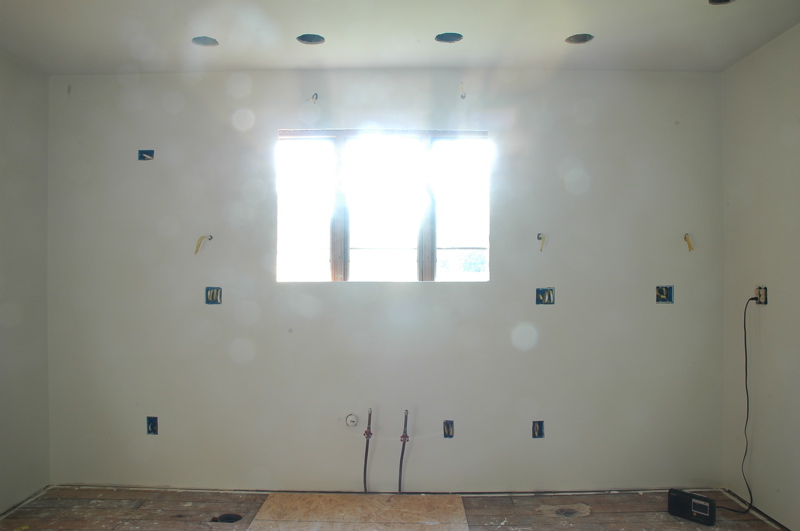
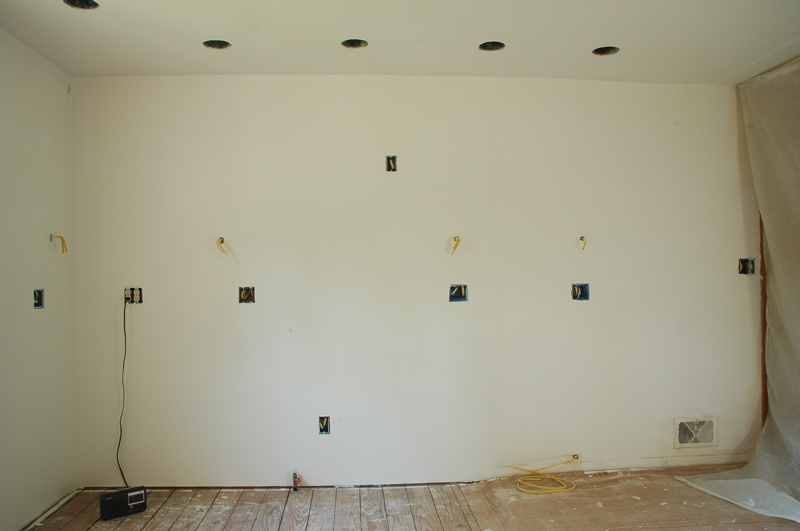
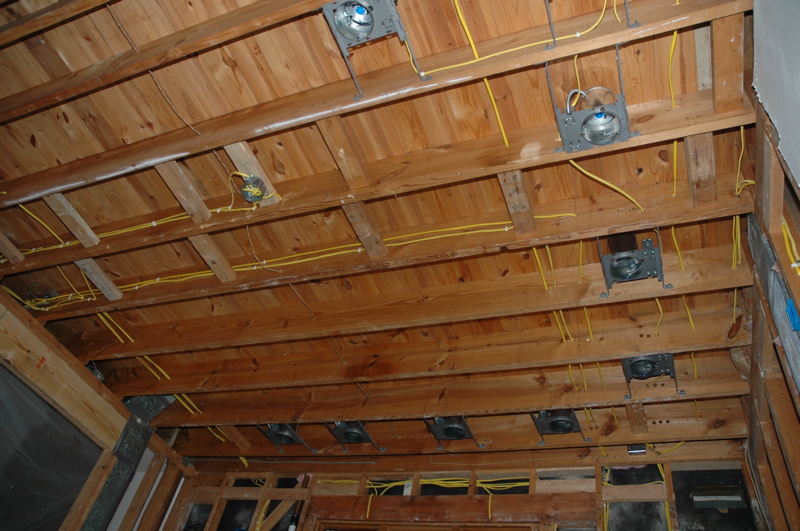
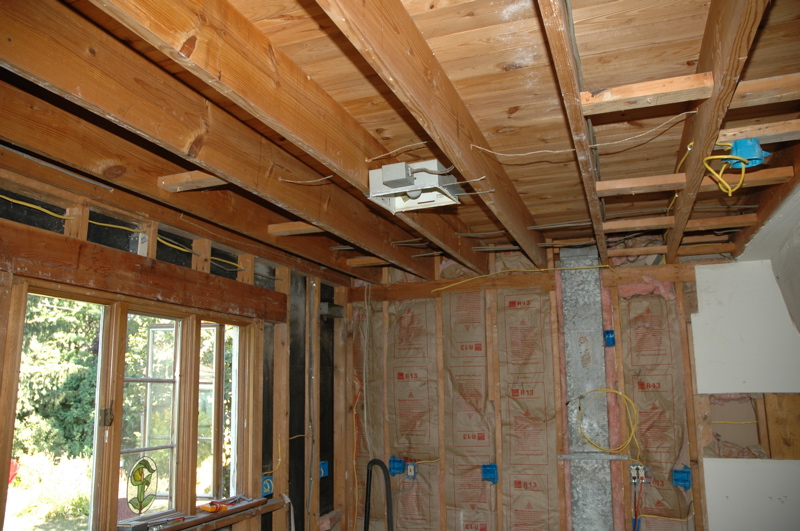
Luke mentioned that our old kitchen only had three lights. We counted 20 in this new kitchen. Look at all those ceiling lights and the wires for the under-cabinet lights. This kitchen is going to be nice… and bright!
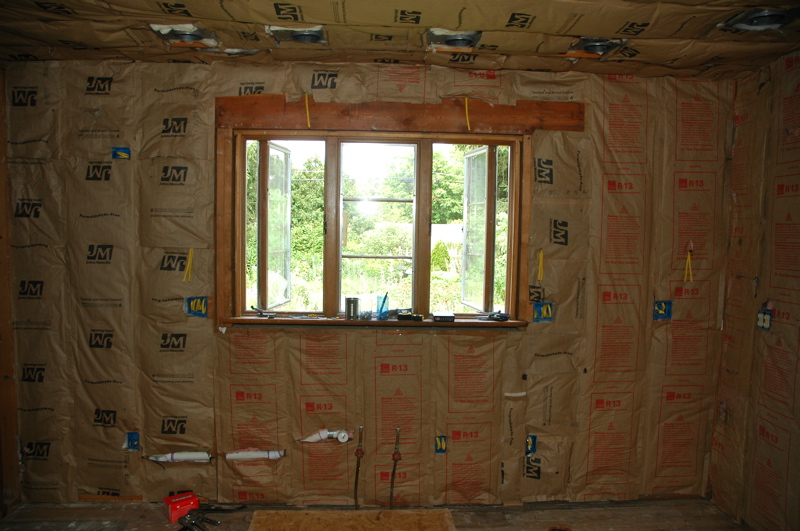
The first half of the day yesterday was spent finishing up little projects. I needed to move one run of wire, add some cabinet backing, and stuff like that. Then I insulated the W and N wall and ceiling. The walls are insulated for a thermal barrier. The ceiling was insulated as an acoustic barrier. This task took me the second half of yesterday and the first half of today. Wiring took about a week longer than I had anticipated. While you’re wiring, it doesn’t look like you’re accomplishing much. You drill some holes, you pull a run of wire, you nail up a box. Little changes visually. Then you put up the insulation and the room changes dramatically, even thought it took less than a day to insulate two walls and a ceiling. Luke works 3rd shift this summer. When he came downstairs today, the first thing out of his mouth was, “Wow!”
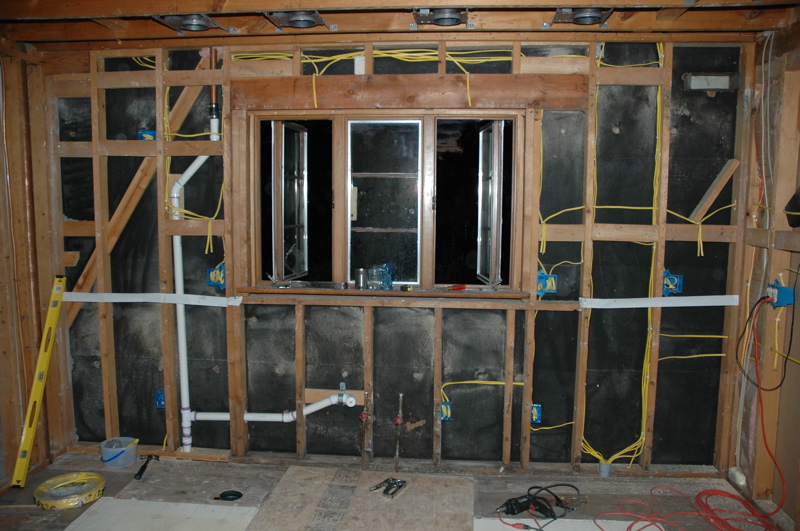
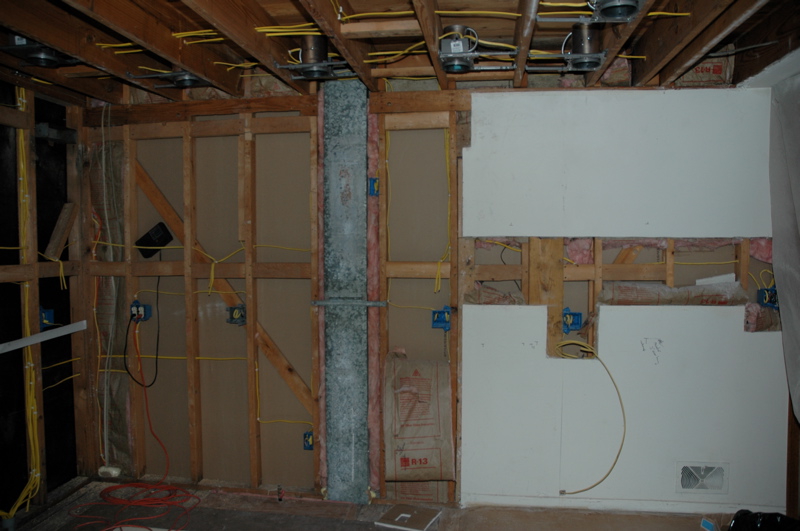
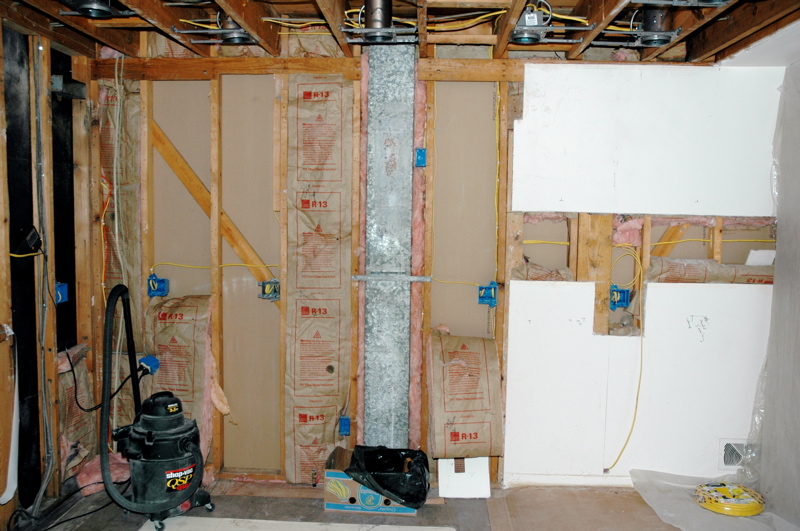
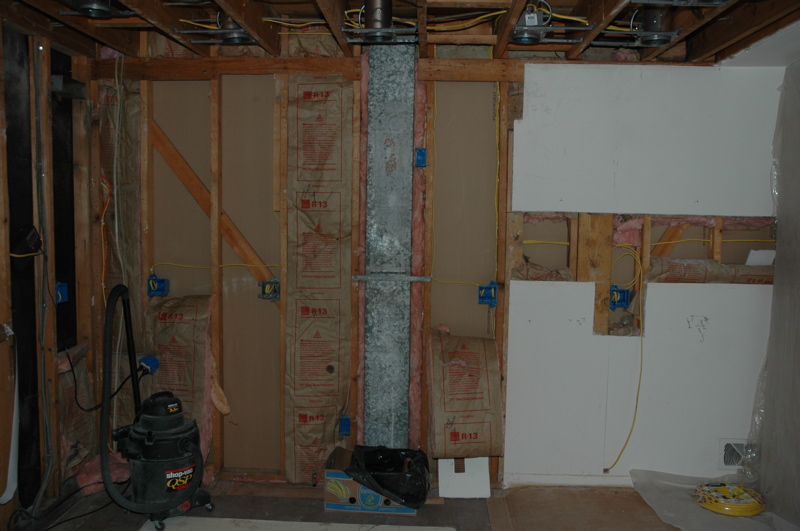
The image on the left is the W wall and the image on the right is the N wall.
I put up drywall the second half of today. Noel and Luke helped me. The kitchen area is 13′ x 13′. Drywall comes in 4′ widths and 8′, 10′, or 12′ lengths. To minimize the number of butt seams, I we put 12′ pieces on the ceiling. The 1′ that is left on the two sides will be covered by cabinets. I also got he S wall done.
Ha Ha… See, the title is another electricity joke…
Wiring has taken me longer than expected. I honestly thought that I would be finished with it last week. This week, I went to the store to buy another 250′ role of 12-2 wire. I finished my first roll and have almost finished the second roll. That’s a lot of copper. The good news is that I finished all the wiring last night. All of it. Yahoo! If you enlarge the pictures below, you’ll see lots of yellow wire. Modern kitchens take lots of electricity. I have run six circuits. Code requires two 20A circuits for the countertops, one for the lights, and one for the refrigerator. In addition, I have one for the microwave and our gas range and one for the dishwasher and garbage disposal.
I had only one “incident.” I did the exact same thing when I wired the dining room. It all has to do with drilling holes through studs and hitting a wire. This time, I just barely nicked the wire. Originally, I thought that I’d just use my utility knife to open the insulation and to wrap each wire with electrical tape. I had to use my screwdriver to separate the wires. You know, all those yellow wires mean “new wire” and the circuits are not hot, right? Oh, yea… I did rewire some old circuits, and they are hot. Now I remember. So, when the screwdriver hit the black wire and connected it to the ground… well… the breaker blew. (Let’s just keep this a secret between us and don’t tell my Mom… O.K.?) Bottom line? I replaced that entire wire.
I also changed the plumbing again. When I replaced it earlier, I just “redid” the pipe that was already there. My good friend Lee said, “Something doesn’t look right with that plumbing.” He suggested that I raise the height of the inlet, which I did. Then earlier this week I was at Meinards looking through the plumbing books. They only had one inlet. My circuit had two. I cut it out.
I also put up lots of small sections of 2×4 between the wall studs. These backing boards will make it easy to install the cabinets later.
Noel and I also spent a couple of hours going to the building supply stores looking for elegant ways to wire our phone and internet wiring in the house. We haven’t found exactly what we need yet. I did run one circuit for a phone on the South wall.
This morning I ripped out the old floor and spent some time pulling staples out of the floor. The floors of old houses squeak a lot. I spent some time trying to locate the major squeaks and tried to eliminate them by adding lots of screws through the pine subfloor.
Images (L -> R): S kitchen wall, W kitchen wall, N kitchen wall, ceiling (West is “down” in the picture.)
Good question.
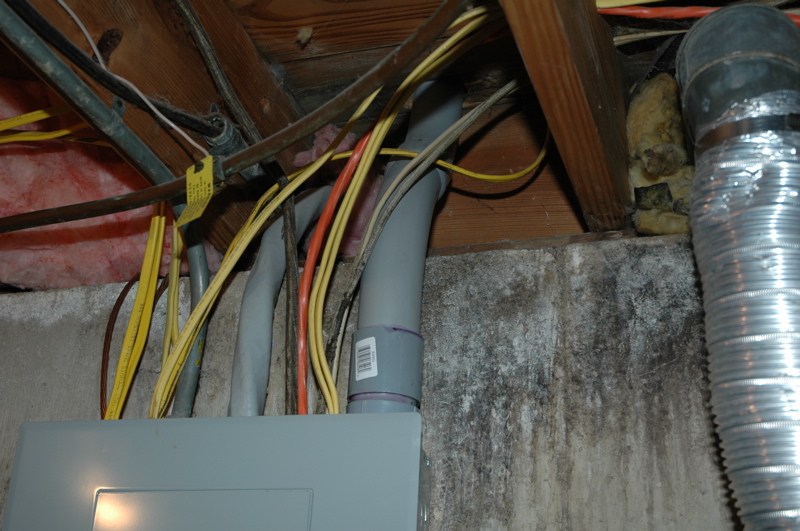
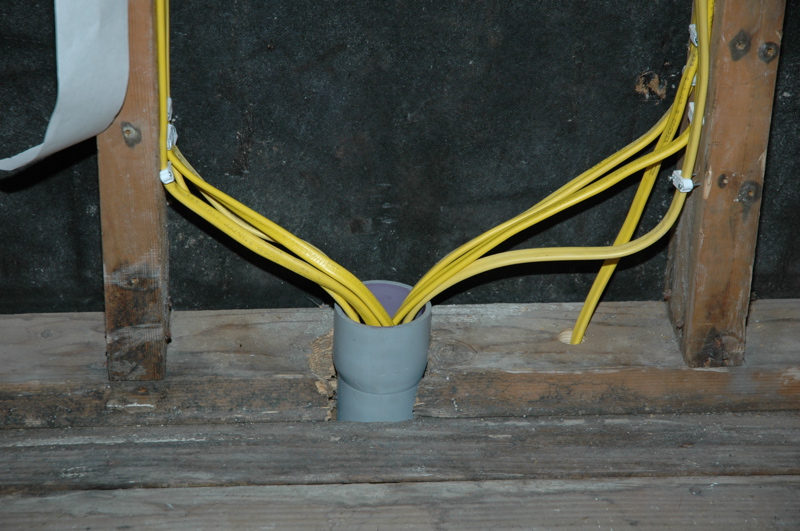
Remember that ugly wiring that I found behind the West wall? The one where a bunch of wires were going through the same conduit to the main breaker box. Here’s a reminder:
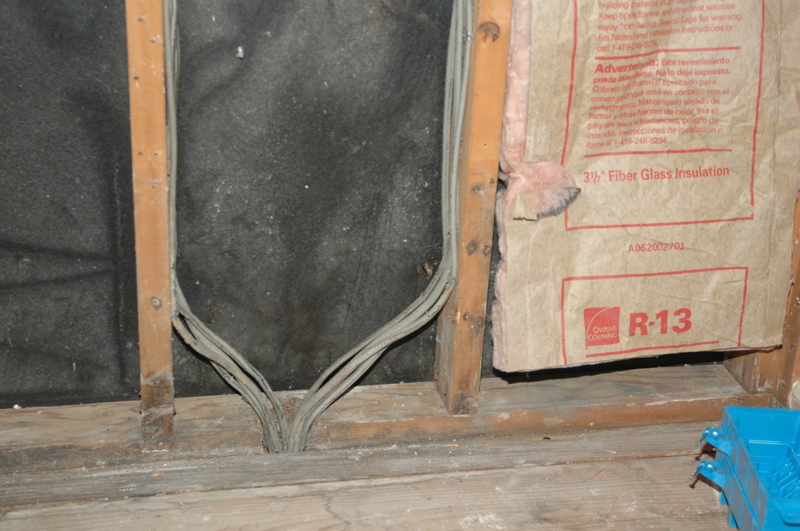
I had the main breaker box replaced a few years ago. The two guys who did the work stuffed all these wires in that conduit. However, since the insulation had been stripped off before they reached the breaker box, I had no idea which hot, white, and ground went together. As a result, I had extra wires filling that conduit. On top of that, the conduit was wobbly. It could easily slide up and down for an inch. This caused some fraying of the wire insulation at the top of the conduit.
I started the day by having Sharon push and pull on these wires while I was in the basement so that I could tell which hot, white, and ground went to each other. Then I pulled out the “surplus” wires. As she was helping me, she found that the guys who had installed the new breaker box had also run a screw partially through one of the wires.
I think that screw was the last straw in helping me to decide to rip out as much of the old wiring as I could. Now would be the time to do so since the walls and ceiling were already torn out. Bottom line? Here’s the new work:
My good friend Lee stopped by yesterday. Lee helped me a lot when I remodeled my last house. He spent a lot of time and particularly taught me about wiring. When he came yesterday, he announced that the “building inspector” had arrived. And I’m glad that he did. He gave me a half dozen suggestions as to how I could improve my remodeling project.
When I put the can in the ceiling last week, I had to push on of the house wires out of the way. Something about the fact that two objects can’t occupy the same space at the same time. Lee told me that the wires needed air all the way around them for cooling. It wasn’t a good idea for me to have them touching the cans. So, one of my first tasks today was to cut out this old wire and to run new wire in a new location, away from the cans. And did I mention that I needed to tear out even more of the ceiling to install the box that connects this new wire to the old? This time, I only needed to tear out an area about 16″ square.
Actually, my first task was to work up my courage to change the circuits in the main electric box. I wanted all my kitchen circuit breakers together. After hemming and hawing for a while, I opened the front of the box, moved the breakers, and relabeled the inside panel door. Phew! In addition to the line that I mentioned above, I also moved the entrance to one of the basement lines, wired the kitchen circuit to the box, and wired the lighting circuit to the box.
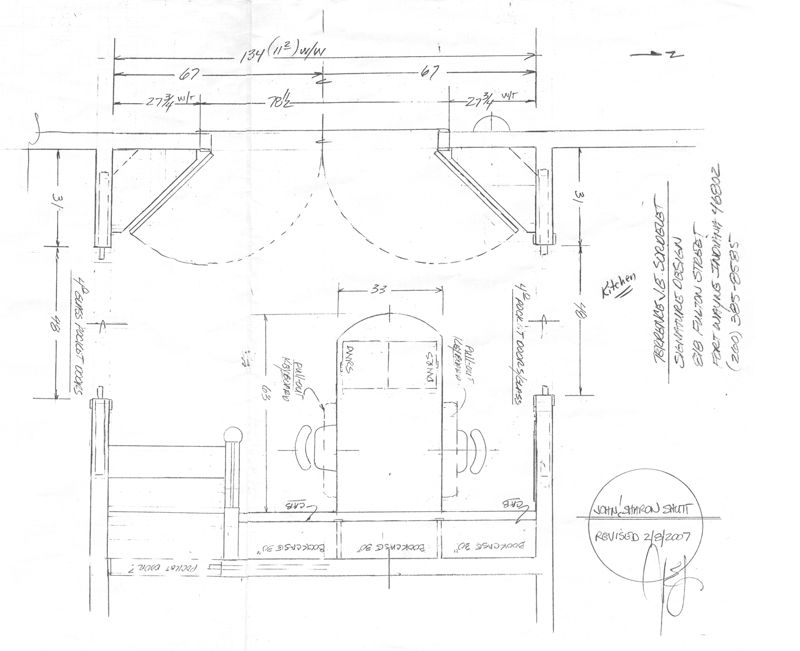
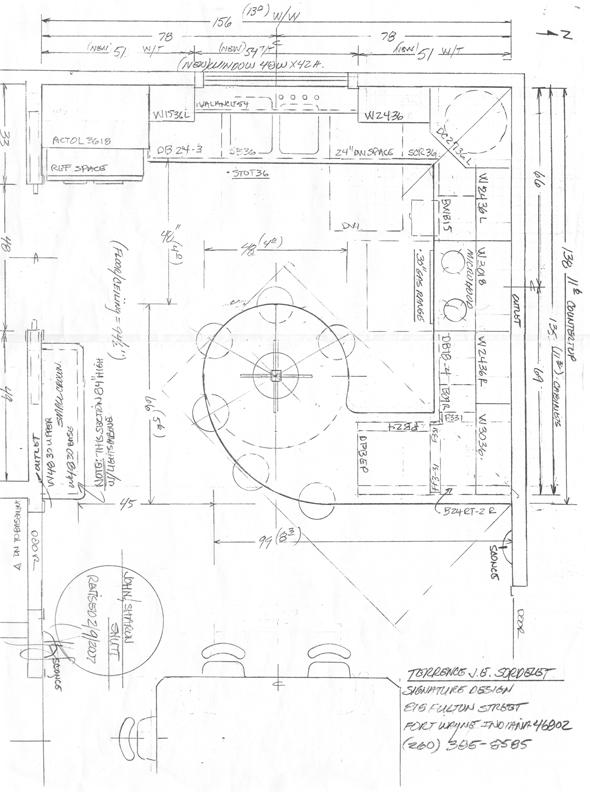
I thought that you might like to see what this kitchen remodel is going to look like when it’s finished. Here are the blueprints. I have also included a scan to show how I am going to remodel the room that is next to the kitchen.
What? You’ve never seen my house? Here is an infrared picture that I took a couple of years ago. To orient you, the house faces the East. (Which means that we are looking West. North is to the right and South is to the left.) The window all the way on the left is our living room. It goes all the way across the first floor to the back of the house. The door leads into the entryway. Enter and walk straight ahead to the steps that lead upstairs. In back of the steps is the dining/craft/back-centerwe-never-know-what-to-to-call-it room. Enter the door and turn to the right an you pass the half bath on the way to the dining area. The dining area is that window on the right before the garage. The kitchen in behind the dining area on the NW corner of the first floor.

New plans: “Back-center room (to be remodeled in the future) and adjacent new kitchen plans.
A week or so ago, Terri came over and we sketched out the wiring layout for the lights. Now it’s time to get all those wires in the wall. We went to Trinity Home Design Center on Monday and bought 5′ cans to go into the ceiling. The wiring started to go in late Wednesday afternoon. (Wednesday night I worked on a friend’s car.) The wall boxes and switches were nailed in at the proper height and location.
The ceiling lights gave me some trouble. (Remodeling a house is always a task involving problem solving.) It all started with the box that is going to be over the peninsula. I didn’t know how far to hang it from the bottom edge of the floor joists. Now that sounds silly, doesn’t it? Hang it 1/2″ below to account for the thickness of the drywall that you’re putting on the ceiling? No problem, eh? Well, when I tore the plaster out of the kitchen, I stopped right where the soffit started. I measured its thickness at 7/8″. So how do I match the old ceiling to the new one? I started by ripping out 16″ more of the ceiling plaster. I reasoned that the plaster edge, where it joined the soffit, may be thicker than average. (And I thought that I had finished ripping out all that dirty plaster.) How thick was it now? 7/8″ So, do I shim the new ceiling to lower it to match the old or do I rip the old to meet the new? I decided to rip out the old ceiling. (At least that’s my decision today.)
On Friday, I hung the new ceiling light cans. I realized that I needed to hang two cans in the area where I still had plaster ceiling. Bummer! If I had thought of that last night, I could have ripped out the plaster in one shot rather than in two. It was time to rip out yet more of that nasty, dusty plaster. Sigh… Friday night was spent helping my daughters get their photography prints ready for 4-H. They each won a blue ribbon.
Saturday was spent doing more wall wiring and wiring the ceiling light cans. I knocked off work about 7:30 to head out to dinner with Sharon at a Chinese carryout restaurant.
Images (L -> R): Old ceiling, Ceiling with new light cans, New N wall wiring.
Sometime over the last year or so, my kitchen drain started to leak. Well, it actually was the pipe inside the wall that started to leak. It was made of copper. Now I remember going to my Grandparent Schutt’s house as a young kid. They had copper drain plumbing in their house. I remember thinking that they were so rich. Everytime that I visited their house, I’d be amazed at that copper drain pipe. (Yea… I didn’t live much of a life…) So now I live in a house with copper pipe, and i want to tear it out. Copper is a metal. (Yea. I know. I get that smart by being a college professor.) Metals, it turns out, are eaten by acids. (That’s why the city water works keeps the pH of our water about 7 — so that the water doesn’t eat metal pipes. My last house had lead pipes, but that’s another story.) So, the copper pipes in the kitchen drain were shot. It’s time to replace them.
I need to add an electric outlet to the left of my kitchen window. The drain vent has to go… So, cut out all the old copper pipes, cut new pvc pipe, prime the new joints, and glue them together.
Old: 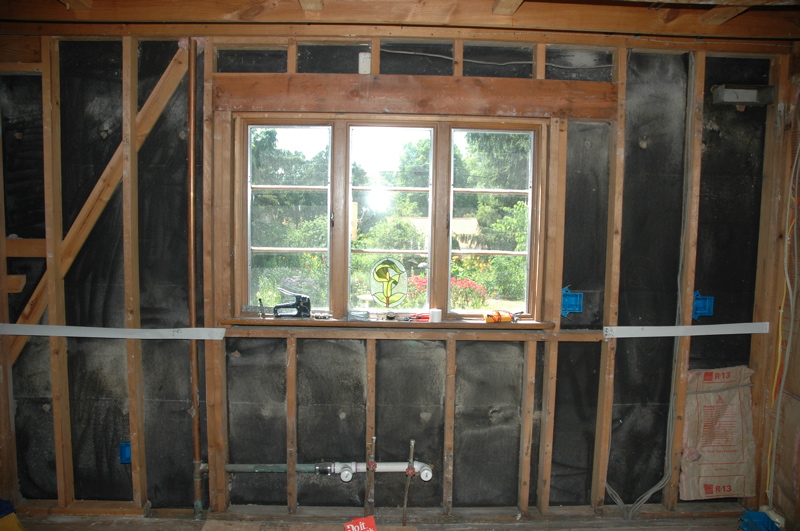 New:
New: 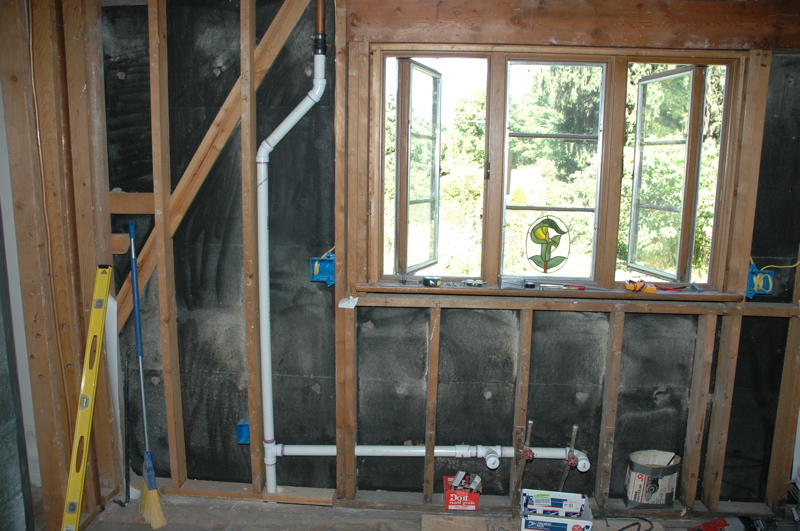
Old: 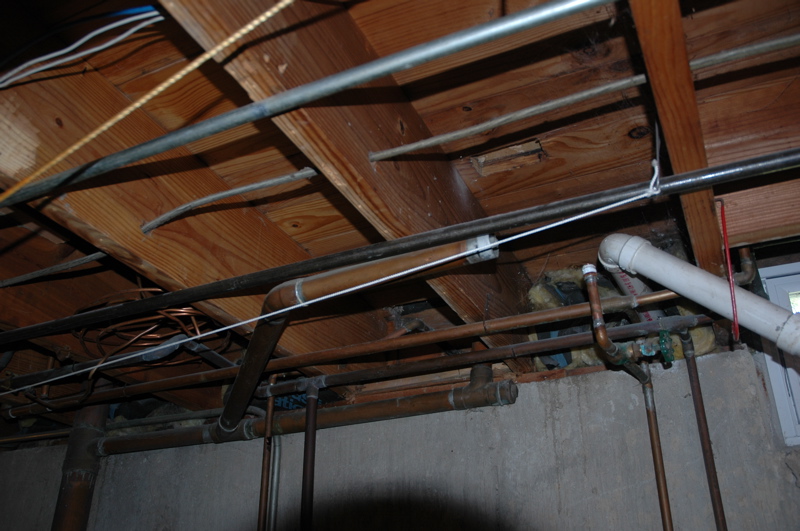 New:
New: 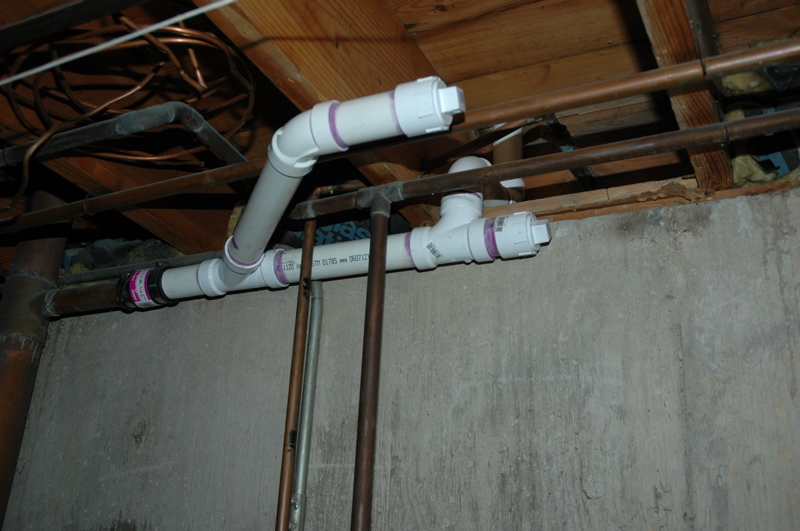
Thanks, Aaron (age 11) for the help! =]
