Archive for December, 2013

Week 3: The REAL Studio Tour

Friday, December 20th, 2013

Today is the final stop on Vicki Welsh’s Real Studio Tour. We are to share photos of our spaces where we work/play/create!

My sewing set up is now in a room that my girls out grew. It is a good sized room of about 14 feet by 24 feet. It is what we call the bunk bed room because of the two sets of built in bunk beds. Fifteen years ago, while hunting for a larger house for our growing family – we have five children – a friend recommended this house to us. When we toured it, the girls named it the bunk bed house. The girls, then 3, 6, and 9 all shared the bunk bed room. Their older brothers each got their own room. I set up my sewing area in the fifth unclaimed bed room. Then the brothers grew up and went off to college and the girls decided they would like to have their own rooms. So everything got switched around and I ended up setting up shop in the bunk bed room! I like it for the space, but I really don’t care much for the bunk beds as there is just so little wall space in this room. But there are also 2 built-in desks, one built-in dresser, a walk-in closet, and two side-by-side closets. So lots of space and storage to utilize.

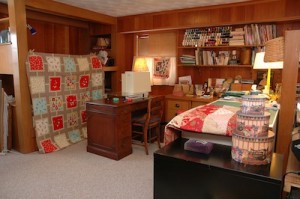
Here are photos of it all clean and organized when I took over the space three years ago.

Above picture is what you see when you walk in and look to the right. The kids use the bottom bunk as a day bed and watch movies on the computer.

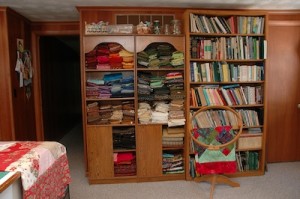
Above, is the room to the left as you walk in the door. I’m using the bunk beds as storage at this point and hang up the most recently made quilt to cover up the messy storage.

Oh look at that clean floor! I’ll be showing you ‘real life’ in just a bit. The book shelf on the right are mostly my husbands books. In the units are the left, I organized my fabric by color. So pretty to look at!

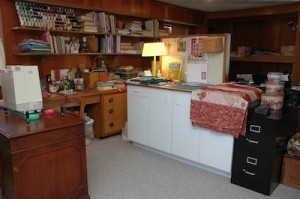
Here you see my cutting station on top of a Lowe’s cabinet with lots of storage. The built in dresser is full of UFOs. Eeck! Too many of those! The book shelves are full of thread,  quilting books and supplies.

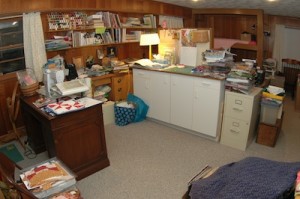
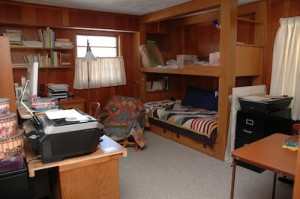
And what does this space look like today?

(Taken with a wide angle lens). See the blue fabric in the front right? Which is in front of the book shelves, it is covering up storage boxes, serger, UFOs, bits and pieces.  How many of my Protect-n-Store boxes do you count!? I have personal WIP in some of the boxes, and demo boxes for Fabrics and Friends Quilt Shop where I work  play.

Oh, I made new curtains for this room, which I like. And I have even done some cleaning out. Over Christmas break I hope to finish up a Block-of-the-Month for the quilt shop and also a clothing quilt for a customer. Then I hope to organize some for the start of the New Year.

For those of you who guessed at the number of Protect-n-Store boxes in my possession, the current number is 22. ☺

Hop on over to Vicki’s blog to see how other quilters have their studios set up and to also add yours to the link!


Week 2: The REAL Studio Tour

Friday, December 13th, 2013

Vicki’s week #2 for  The Real Studio Tour, Storage Solutions is up. Check out the links to see how fellow quilters are solving their storage issues! And link up yourself.

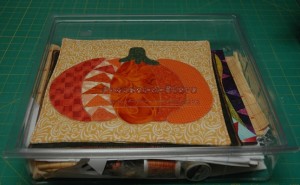
I learned about these Protect-n-Store boxes several years ago and asked my local quilt shop, Fabrics and Friends Quilt Shop in Roanoke, IN, if they would carry them. And they now do! $6.99 a piece. They are a good size at 12 1/2″ square and 3″ deep. I use them for projects-in-progress.

I’m NOT going to tell you how many of these great boxes I have in use! Want to guess?! ☺


The REAL Studio Tour with Vicki Welsh

Saturday, December 7th, 2013

Vicki is hosting a Studio Tour for bloggers to link up answering three questions over the course of three weeks – using pictures from our own studios! The first week, we are to show a non-traditional tool we use in our studio.

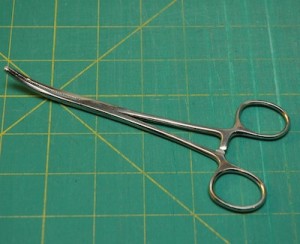
I use a hemostat for turning applique pieces and tubes right side out. They also are handy in place of a pair of twisters. For example – dislodging thread stuck in the bobbin case. And they are good for pushing out the corners of projects like pillow cases. I keep a pair handy right next to my sewing machine. This curved tipped hemostat in the picture is actually my ‘stand in’ pair, as I have misplaced my favorite straight tipped hemostat in the current clutter of my studio. (Yes, I’ll reveal that creative mess to you December 20th!)

To join in the fun, visit Vicki’s blog post: The REAL Studio Tour!

Playing with Flange Bindings

Tuesday, December 3rd, 2013

I’ve been seeing posts on Pinterest lately about a binding method gals are calling a Faux Flange Binding. Some of the first links I followed didn’t give instructions. Playing around with dimensions, I came up with a size I like for a finished binding and flange. I’m calling this technique an “All-In-One Flange Binding” because it is not a faux flange – it really is a flange! And the technique combines the flange and binding together.

Here’s how I made the All-In-One Flange Binding -

Materials Needed

Two fabrics to coordinate with your finished quilted quilt top.

One fabric is for the binding, strips cut at  1  1/2” wide.

Coordinating fabric for the flange, strips cut at 2” wide.

(Instructions do not include yardage needed for binding. Consult your favorite binding chart or app for yardage needed.)

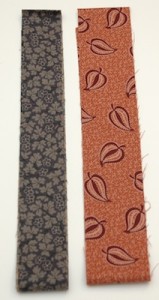
Cut the number of strips needed for the binding and flange for your size of quilt. Binding strips (blue in photo) are cut at  1  1/2” wide. Flange strips (rust in photo) are cut at 2” wide.
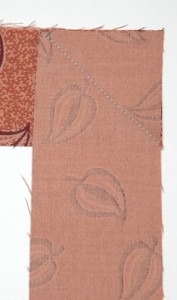
Sew together all binding strips end-to-end using a mitered seam for one long continuous strip. Do the same with the flange strips. Trim and press seams. (Flange strips shown in photo.)
 

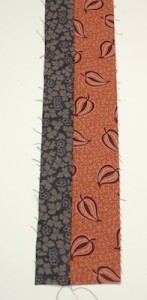
Sew together the binding strip and the flange strip, side-by-side using a 1/4” seam allowance to make one long continuous strip. Press seam allowance towards darker fabric.

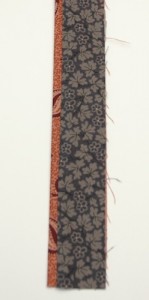
Press wrong sides together matching raw edges together. The flange fabric will be folded over onto the binding side of the strip with about 1/4” showing.
 
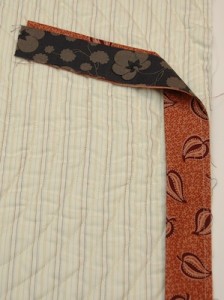
On the back of your prepared quilt, (quilted and squared up) sew binding side down using a generous 1/4” seam allowance. Leave about an 8” flap at the start and finish so you can miter finish your binding with your favorite method. A Walking Foot is helpful for this step.
 
Press binding over off the back of the quilt.

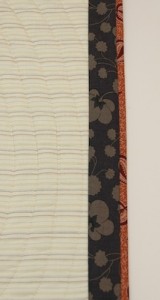
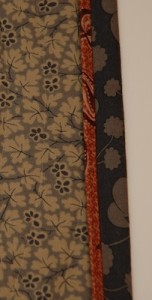
On the front of the quilt, press binding towards front of quilt, covering seam allowance. There will be about 1/2″ of binding fabric showing on the front with a 1/4″ flange.

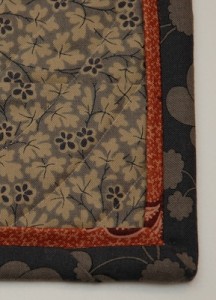
Press a miter at each corner. Pin if necessary to hold binding in place.

Stitch in-the-ditch between the binding fabric and the flange fabric with thread coordinating with the flange fabric. (I used a rust for the top thread to match the flange, and a cream in the bobbin to match the quilt back.)

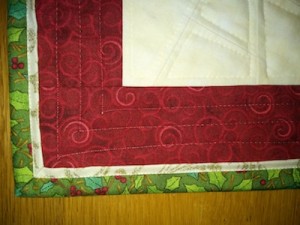
You will have about a 1/2” of binding fabric and a 1/4” flange showing on the front of your quilt.

Your quilt is complete with a flange to add a nice pop to your quilt! And it was all machine sewn! Quick and easy!